Right Hemithyroidectomy
Transcription
INTRODUCTION
My name is Dr. Roy Phitayakorn and today you were going to see a diagnostic right hemithyroidectomy and isthmusectomy with recurrent laryngeal nerve monitoring. First, we're going to position the patient, and then you're going to see me use an ultrasound machine to look at the thyroid and mark out its pertinent landmarks. You’ll then see us make a 5cm incision above the sternal notch and dissect down to the thyroid gland. We will then carefully ligate the upper, middle, and inferior pole of the thyroid gland and then carefully separate the right superior and inferior parathyroid glands from its under surface. You then see us find the recurrent laryngeal nerve, protect it, and proceeded to remove the thyroid gland off of the trachea.
CHAPTER 1
Okay so just to review here - so we’ve padded all bony prominences. Okay, and we put OB sponges underneath all the IVs. We've cut off the plastic piece over here so it doesn’t pinch his skin, and then we wrap him up kind of like a burrito - you have the cloth table? Alright, we wrap it around from elbow to elbow. Josh, how’s your IV? It’s running great - great.
Then we put the patient into a what's called a modified Fowler position or semi Fowler position - otherwise known as beach chair. Okay and then at Mass General, we use what’s called a thyroid bag to provide some extension. As you can see, I inflate it slowly and Josh's watching the head of the patient - to make sure that the patient doesn't have any neck injury as we inflate. She's kind of like up like this - almost like in a sniffing position as they call it - which brings his thyroid out from behind the - the sternal notch.
Okay then we hook up the nerve monitor if you want to come over here and take a look at this. We use the Nirvana nerve monitor. So basically this is used to monitor the recurrent laryngeal nerve, and we use what’s called an intermittent stimulation system as opposed to continuous nerve monitoring. So you can see here as a result of his position, you can see this the right thyroid nodule actually quite nicely. It’s basically bulging out of his neck here. You can see if I push, you can see it.
So I put the gel on the probe, and then I touch the side to make sure that if I’m touching the left side of the probe, the left side moves. Okay, so we know the probe is oriented correctly, and then I place it here over the patient. The thyroid sits on the thyroid cartilage like the saddle sits on a horse. Okay, so the cartilage of the trachea here is basically the horse, and then the thyroid is the saddle. As you can see here's the little bridge of the saddle. As we go over to the right side, you can see there’s a very large nodule that’s basically occupying the whole screen here. Okay, that's it right here. Over here is a carotid artery, and that's his jugular vein right here. Okay, so carotid artery, jugular vein, and then giant thyroid nodule. And if you go down, you can see it is not substernal - it seems to end above his sternal notch - and as you scroll up, you can see the thyroid pole and right there. So we have to go up at least this high, so it looks like the best incision will be the middle incision then. So we’re basically looking at a distance from here to here, so we choose the middle incision so that we can get up to the upper pole.
And I'll take a lap pad. Ruler and marking pen.
CHAPTER 2
So I mark his sternal notch. Mark his chin. Thyroid cartilage is there, so the middle of the incision to be somewhere around here. We’re gonna try and do this through a 5cm incision, which is basically the same size as the nodule, so I may have to enlarge that a little bit. Yeah, I can try. Okay, so this is a 5cm incision with a little bit extra in case we need it. Ready for time out.
We’re doing right thyroid lobectomy. Pull straight up - great. So you can see in a man, the platysma is actually quite thick - right here - but it still doesn't K-seem to connect in the middle. Right, okay. As we talked about last time, it’s an example of how Netter’s wrong. He’s not wrong often, but he is wrong here. Almost - you got to grab that other edge - yep - perfect. Pull straight up. Very muscular guy. And then with the hooks underneath the edge of the platysma, we’ll raise our superior skin flap to the south of the thyroid cartilage, and then you'll do the inferior side.
And as you can see, here - this is the anterior jugular veins - here and here - so we're trying to leave those down while raising the skin flap. So what I do is I pull down with my sponge here. I’m basically trying to bluntly dissect the plane here. ‘Til we get to the top of the thyroid cartilage. This is the deep cervical fascia here, and this is his platysma which is elevated as a skin flap, and you can see the anterior jugular veins - one is here, one is here. This just might be a branch of one - it’s kind of hard to tell at this point.
We’ll now do our inferior skin flaps down to the sternal notch. And what Dana's doing is she's using her finger to kind of gently, bluntly dissect along this plane to create it - our flap. Alright, we're next going to raise our lateral flaps which go to the end of the sternocleido - excuse me - to the beginning of the sternocleidomastoid muscle. On the left side, we won't do as much dissection since it's only a right thyroid lobectomy, and we're not doing a total. If we are doing a total, we would also elevate flaps all the way out onto the left side.
So as you - keep those - so as you can see, this is the sternocleidomastoid muscle here. Alright, we’ll do this on my side now. Watch your fingers. Okay, so we’re going to use the Mets. So sometimes you see the situation where there is a branch coming off the anterior jugular that’s going up on the skin flap. So what you do is you - exactly, pull down on that - and I typically use Mets to create a plane, and then now you can see where to go. Nice. Good - use your finger exactly. Feel good? Yeah - good. Nice - okay, so we just going to get hemostasis here.
On this next step, I like to protect the skin with microfoam, so I will take the microfoam pieces which Chelsea's been nice enough to cut already. And then a Weeland retractor. Okay so once again, this is the deep cervical fascia. We're now going to get ready to incise it in the midline between these two anterior jugular veins. You can see this one is much larger than this vein probably because of the mass effect of the large right thyroid nodule. So we will palpate. Here's the thyroid cartilage, so the midline is somewhere here. Go ahead open that up. Right angle please. Okay - perfect. Okay, so now we're looking for is the sternohyoid muscle. Here's one muscle belly, I think that's mine. Here you go. Still think it's mine. Baby rich. So you can now see the sternothyroid muscle being exposed. Because it's a large thyroid nodule, I like to separate the sternohyoid from sternothyroid, so first we'll finish our midline dissection.
Okay so you can see we're right here on the sternal notch - okay - which is far low as we need to go. We're going to take a little bit of this, and you want to be mindful as you go behind the sternal notch that they can have a high innominate artery, which would obviously make for a very bad day to get into. That would end up - you can possibly end up having to enter the chest in the situation - exactly. Okay, can you buzz me here?
Okay, so we've now exposed the sterno - can you hold that over for a second. This is the left sternothyroid muscle over here. This is the right sternothyroid muscle. Okay, so we’re first going to separate the sternohyoid and sternothyroid just to give ourselves a little bit of wiggle room for such a large thyroid nodule, and I really find is one of the key steps when you have a very large thyroid nodule and you’re trying to take it out of an incision that's actually smaller than the nodule. Okay, so we’ve basically separate the two as you can see, and we're now going to take off the sternothyroid muscle. Stay right up against the border of the muscle. Little bit closer - that’s thyroid - up here. Good - buzz that vessel - good. Okay.
We're now taking down this kind of cotton can - oh no, Bovie it. We're now going to Bovie this cotton candy looking stuff because there's some small vessels in there. Take a lady finger retractor now. And what I'm using is the retractor to kind of hook underneath the muscle, and then Dana is going to pull the thyroid towards herself and we're providing traction, countertraction. So we’re going to keep pulling the thyroid nodule towards the medial side here. Can I get a peanut? So she's pointing the carotid artery, and there's the middle thyroid vein probably right there - or inferior thyroid veins - hard to tell at this point. So Dana, why don't you take a right angle and take that vein now before we - or I rip it. And Chelsea, we’re going to use medium clips. Okay, and pull that close and go towards you. Nice. One more. Alright, open up the - great - and then see if we can pull that little more towards yourself there. Okay, borrow your debate for a second. And then open - I’m sorry - go towards you. Okay. Alright, so now we're going to look upwards.
Okay, so you can see the upper pole of the thyroid is still going underneath this muscle right here - the sternothyroid. Okay, so we're going to continue dissecting that down. Sucker on please. Kay - as you can see now again we got the carotid, and we're now dissecting around the upper pole vessels here. Now going to go look medially, baby rich. Now, this is the trachea. Here's a thyroid cartilage. You can see that knob right there, so we're trying to find here is the space between the thyroid and the cricothyroid muscle, preferably staying out of the large vessels that are on the thyroid. I’ll take a medium clip. I'm back on the 2nd. Medium clip. Okay, so they want to wear…
Okay, what you can see here is we do have the cricothyroid muscle right here, and this is the thyroid over here. Okay, and we create a little space here. The external branch of the superior laryngeal nerve is going to be up in this area. Okay, so what we got to do next is carefully dissect the upper pulled down without getting into the external branch of the superior laryngeal.
CHAPTER 3
Medium clips. Oka,y and then you going to hold like this. Okay so what I’m to do next is I’m going to Chopstick my way down around the upper pole on this side. Alright, so take a Jacobson Schmidt - a little sucker. I'm looking for a space between the cricothyroid muscle and the thyroid hole, which looks like it’s right about there. Can you Bovie that - the flim-flam stuff above my Jacobson Schmidt? I’ll take a big Kelly. Okay Dana - undo your clips, okay? You gotta leave the clamps - you gotta leave that retractor in. And this is the Hodin technique here for taking down the upper pole. K - hold that down there for a second. Take some irrigation please. Okay, so what you guys can see here, is a - here is the rest of the upper pole of the thyroid, okay? Big Kelly. Okay. Medium clips. Okay, take the other Kelly off. Okay, medium clips. So now I'm taking the second set of medium clips and I'm putting them almost at a perpendicular angle to the first set. And you going to see it still going. So I’m brushing the muscle away. Alright, Dana if you could hold that retractor for a second. Yep. So again, here is the carotid artery, and it's coming right adjacent to this upper pole. So I'm very carefully separating the upper pole from the carotid artery and getting down to the vertebral body which is the deepest part of our dissection. Medium clip.
Okay, you want to use the Bovie there - you have an extra, third hand there? Nope - stay right through the clips - you’re going into thyroid there. And go ahead go to that last piece. Okay, so if you guys can see this, here is the upper pole that Dana just took down. Here is some flim-flam stuff that's a - holding it down to - towards the vertebral body, and you can see there's no vessel in there - there's no parathyroid gland - that's what we're checking for. Okay, so I'm just going to go ahead and take that with the electrocautery and actually some clips first. One more. Okay. And then you want to go ahead and take that down there. Okay, so that's - that takes care of our upper pole. Just get that little bit there.
Medium body wall retractor. And you can see here there is muscle that’s just loosely attached to his thyroid right here, which were going to take next. Right angle. Good, and then keep coming across exactly. Okay - hold on one second. We're getting back to where we took down that middle of thyroidal vein, and you can see a lot of this stuff can be done bluntly.
Okay I'm going to swing down here, and see if we can find the inferior pole to this mass. Take a peanut. And I think we’re going to need a lady finger. Alright, anyone hold that up. And I got this one. So this is kinda up and out. Got it? So again, here are the - it’s probably the inferior thyroid artery is right here. Okay, and that vascular bundle there - Jacobson Schmidt - keep holding up. And you can see, it's probably bifurcating so there’s a branch here, and there's a branch here. We're going to take these now, being very mindful to not take too much otherwise you could lose the blood supply to the inferior parathyroid. Actually, can I have a right angle first. Medium clips. Dr. Phitayakorn, what are the Bovie settings? Should be 25, 25. Generally, you want to use kind of lower energy than you would say for the belly because there’s potential for scatter, and you don't actually damage the nerve. Okay great, so that takes care of her inferior pole.
Medium body well. So at this point in time, I typically like to find the trachea because it is a fix landmark for us. I think it's right here - Jacobson Schmidt. Okay, so there you guys can see the trachea right here. Okay so we going to take this vessel right here, and that'll mark the extent of our hemithyroidectomy on the left side. Let's go underneath the vein. Medium clips. And my practice is just to put two clips on the side of staying in, one clip on the side that’s coming out.
Okay so now, you can see here - if I bring the retractor over - just got this one band left. Going to do the same thing again. Medium clips. Thank you just lift your Jacobson off the skin there so I don't burn it. Okay peanut - actually I’ll take a sucker instead. So come back over here again. Okay, so as you guys can see now, there is the trachea, okay, and the nerve then is going to be passing somewhere along here. So we’re now going - you have an Alice. I'll take a towel clamp.
Okay so first we're going to get our vagal nerve signal, and the vagus nerve should be just lateral to the carotid. So let's open up the carotid teeth a little bit here. What you see is vagus. There we go. Okay, so that's our positive control signal. Okay, that says that the vagus nerve is intact. The signal then is going all the way down to the recurrent - go down - to the recurrent laryngeal, back up again, and then to the vocal cords, so we know we have not damaged anything and that the nerve monitor works. Get me a widebody wall.
We're now going to dissect and separate this kind of flim-flammy stuff. Okay, right angle. You got it. Okay, cauterize that. Oh yes, I'm sorry Josh - it's working now. When you hear that beep, that means it’s actually working - where before, all we heard was the clicking.
Okay, so again - like this - this is probably one of the superior parathyroid glands here or the super -superior parathyroid gland I should say, not one of, right there. You see when you kind of push there, there’s kinda this sensation - there’s something- some sort of mass - is kind of moving back there - that's probably the parathyroid gland.
There is the inferior parathyroid gland right there okay. So now try to separate it off of the thyroid. Okay, so you grab the parathyroid like - like this and kind of pull it this way, and you can just Bovie this off here if you like. Nice and gentle here. Okay, that's a vessel there, so medium clip - actually small clip - so grab the vessel - good. Thanks Chelsea. Thanks, okay. Nice, okay. Okay that wasn't - that was good. Small clip - maybe medium clip would better. Okay, how’s that? Much better. Alright, I'll take some irrigation.
So we have the inferior para kind of hanging on here okay. And we're just going to check real quick with our nerve monitor because sometimes the nerve can travel right next to the inferior parathyroid gland. Okay, then I would take the medium clip on that band first. Micro-retractor I feel like. Okay. Right angle. Now we're gonna - we’ve created a little band here which is all that’s holding the para on there. Just check it with the nerve monitor real quick and then medium clip it. Just two clips down - I don’t think you’re going to get another one in there - it's too tight. And down towards the trachea. Good, alright.
Okay so that leaves the inferior parathyroid gland intact and sitting happily right there- okay - off the thyroid. So that is how you could inadvertently remove parathyroid gland quite easily. Okay, now we're going to go back to looking for the nerve.
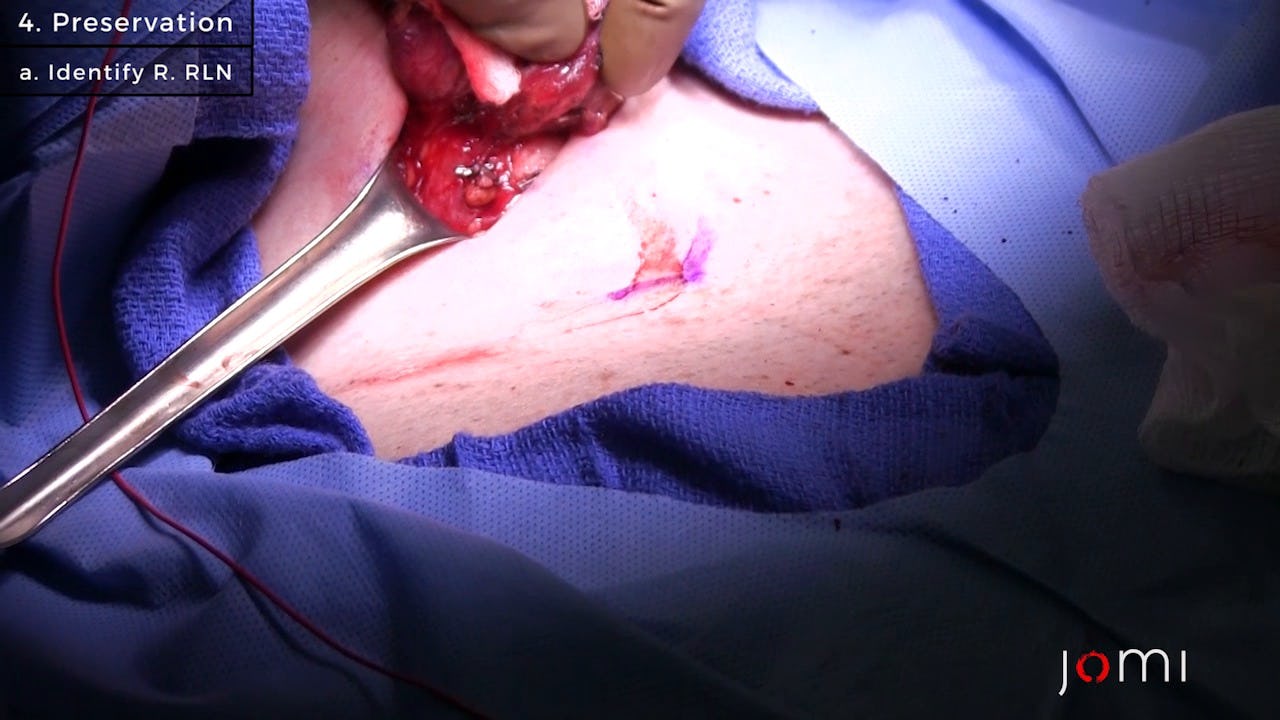
CHAPTER 4
So if I was the nerve, you can see that much of the thyroids already up in the air, so if I was the nerve, I would be down here somewhere in this kind of region. So what I'm going to do is just very gently separate off this loose tissue, which hopefully will then reveal the nerve. Okay you see structure. Right there, that’s beeping. Can you see that Dana - I can. You want to go ahead and lift up like that. I'm just going to very gently make sure the structure is inserting.
Okay so we're going to take off this top piece, okay, so you going to bring this piece down like like that - great. Okay, Bovie. Okay, then hold up like that - great. Right angle. Go ahead and Bovie - nice and gentle. So what you’re hearing there is a false signal. It’s beeping cuz it's touching the trachea basically. Okay, I’ll take a right angle. Alright Dana can you take this vein? I think I’m going to rip it. And one clip on top please. That didn’t work. Go ahead and suction there Dana. Small clip. Another clip applier. I think that one is jammed up there Chelsea. One more.
Okay, now I think the easiest thing Dana, maybe you come on this side. Jacobson Schmidt. Okay, so he appears to have a lymph node right underneath where the nerve should be. See that node right there? Alright, so find the nerve. I think so. Okay, so go ahead and take your Jacobson here, and you want to dissect now, you know, right on top of the nerve, going in the direction that it's going. Okay, so you’ve got to turn your hand. You think it’s that right there? Exactly. Okay, can you guys see that? The white structure? This is the nerve okay, and as typical in man, it's very large, okay. But you can see it's a nerve. Number one it’s white. Number two it’s got a racing stripe on the front of it, okay - that's a sure sign that it’s a nerve. Okay, and as you can see, it’s going in the direction the nerve, and it's inserting right up under here, okay, which means all of this is free and clear.
Okay, so now we’ve got to establish here - this is either a lymph node or its the posterior tubercle of the thyroid. Okay, with our luck, it’s probably the posterior tubercle of the thyroid - which probably has to come off. Yeah, exactly - pull that over. Good so that looks like thyroid, doesn't it? It does.
Okay, now we agreed your nerves are over here right. Okay good, so you’re going to have to try to get this posterior tubercle off, which unfortunately feels very stuck. So I think it's this piece here - you see how it comes up like that - and I think there's a plane on this side of it. Okay, so just carefully try to dissect and see what you can do. You might have to use your other hand to hold here - I can hold the tractor if you need it still. Kind of stuck - huh? Alright, well let's let's do this then: let's take this piece off here okay, and then we can come back and look at that thing again. Okay. So a right angle to Dana. Okay and what I would do is I would - exactly - come over here and try to come out somewhere over here okay. You don’t want to come over here cuz then you going to amputate it - come out down here somewhere so you can get a plane - yep, exactly, yep. Nice, pop through. K - we’ll just skim it to be on the safe side. K - medium clips. 15 blade. Great, hold this. Thank you.
Okay, alright now let's dry that off for yourself. Take a peanut. So this is still trachea, right? That looks like it's all going to come up with you - agreed? Agreed. Okay, so then now we need to get the piece off that’s stuck near the nerve, okay, so show me the nerve again. Good - let go - take your right angle out. Good, now take the Schmidt, okay, and gently trace the nerve up to its insertion point. Nice and gentle - gentle spreads - cuz you don’t want to go into the nerve. Okay good, so there you go.
So this piece is clear right? Cuz you’ve established nerves going that way, okay, so take your Jacobson or your right angle and go from there and come up here somewhere. Come up against the thyroid. Nice - okay, small clip. A gentle spread or even just close and go towards the nerve. Other one. K - 15 blade. Okay, knife back. Okay now you do that again. Right, but this time you're coming up - no over here - go in there, come over here somewhere. Right, cuz it’s all free, right?
Okay, now there’s a large vessel that’s back here that’s going to give us some problems. Sorry for the reaching. Thank you. Okay - Metz. Okay, should be getting there. Okay, another vessel. Let's just do this stim here real quick before you keep going. K - you touch the nerve down there again. Okay. Okay great. Go ahead and take that vessel, and then I think we can start doing our… Small clip. Can I have the forceps please? Another clip. Thank you. 15 blade. Thank you. Knife back. Okay so now what you’re going to do is to take this SpongeBob - moistened.
Okay so we call this a nerve patty or SpongeBob. It’s SpongeBob because of the you know here's the belt, here's the crotch, okay, so it's SpongeBob Squarepants. No official endorsement I guess since we're videotaping this. So now we use this to basically protect the nerve and cover up our clip so we don't accidentally arc onto them. And we’re going to get the Bovie.
Okay so just to - we're clear - okay this is trachea, okay, and you're going to go from - you going to get that band, and then you going to kind of coast up here, okay. Alright, hold on a second. Alright, you're going to coast a little more, right? Watch that forcep - alright - you’re putting that forceps right in nerve territory. K - you’re leaving a little bit of thyroid behind, right? You can see it splitting there, so we need to be a little lower. Hold on a second. Okay - no - try again. Alright, let’s switch for second. K - looks like we’re not free enough yet, okay. So, I want you to do is hold the thyroid over there with your thumb. Right angle. Okay. Medium clips. One more. I should make that another one after this. Thank you. 15 blade. Thank you. Knife is back. Stimulator. Okay, you hold this up gently for a second Dana. Okay, right angle. I just want to check and make sure we're well away from the nerve before I clip this. Okay, medium clips. Is injury to the recurrent laryngeal nerve - is it - sort of a typical male complication in the sense like urinary incontinence - 15 blade please - only happens in a certain percentage - well, national average is about 1%, but we strive for much lower here so - of course. Okay, so that's all loose flim-flam stuff. Bovie.
You guys can see here there's a superior parathyroid gland. It's a little bit of ski make on the top but it's otherwise happy and is laying directly on top of the recurrent laryngeal nerve. Actually, I can show you - maybe. See the nerve. This is superior parathyroid gland - this is the nerve - but you can see when you let go of the retraction, it all just kind of blends on top of each other, you know, and that's how it's very easy to enjoy these structures. Okay, so nerve, okay superior parathyroid gland, and if I let go of the retraction ,you can see it gets very easy to blur everything together. Okay, now the nerve is right there. It's inserting right there okay. Sorry. Can I have another pair of pickups? There is one. I think this will do - thanks though Chelsea. And let me see where you are. Okay, take all that down.
So right now she's going to say they going through the ligament of Berry. Hold on one second. Just going to make absolutely sure the nerve is inserting at that point because this is getting very close to everything. Okay, if I pull this out like this - okay, what I want you to do is slide the nerve stem into that space. You want a plane between the trachea, and this whole piece of whatever this is - thyroid - here. Right, cuz that's where you want to go. Okay, then it should be - okay. See how I created that plane? Good, you can arc onto me just try not to arc onto this clip. You can cover up with SpongeBob - that's fine. Okay - almost there. It's really, really stuck. Okay. Can you remove the stimulator Chelsea? Thank you. K - hold on a second - check. Okay. Alright, there we go - last push. Just get this piece right there. Don't use your forceps because you’re going to arc onto yourself. Good - there we go. Go back right here. Going - okay - there. See how our release is kinda - fruh. Yeah.
CHAPTER 5
Okay, so that’s the ah-ha moment. Watch the skin. Okay now, this looks as if it’s becoming a pyramidal lobe, right? Yes. Okay, so now we're looking at the lobe okay. And you guys can see it's much smaller because the blood is now out of it, right, so it's essentially exsanguinated - that's why it's such a smaller nodule. Okay, so there is a vessel going right here, right, so I would say let's take it like here. Okay, we're going to need another of the prolene stitches, okay, so you need two total. Maybe take a little bit of this flim flam stuff up here first. Good, okay, so now you can get into that plane so I think it's just you know like the score from there to there. No - you went right across the vein - go down this way. See the vein? Here's the end of it - so stay - finish on that side - on my side of it, you know what I mean, the left side - the patient’s left side. Yeah. Watch the skin Move this retractor over. Baby rich. Thank you. Chelsea, can you hold this? K - why don’t you score when I lift it up okay? I got this side - you got the other side. Okay, let's take that last piece off. Medium clips. Hold on a second - don’t Bovie. See what’s going down here. Okay.
Okay, we’re going to need a marking stitch. This is the superior pole. This was the inferior pole. This whole thing was the nodule as you can see here, and we check the back to make sure we inadvertently take a parathyroid gland. It's all clean, which makes sense cuz we did see two parathyroid glands already, but people can always have more than 4. You grab that wide-body wall retractor on the Mayo stand there?
Okay since you got the camera on you, identify the critical structures here. Okay, trachea here. Can you guys see this? Trachea, we have the inferior parathyroid, superior parathyroid in here and there, and where else would you point out? So this is the cricothyroid muscle right there okay. Here’s the top. Here's a thyroid cartilage right here. And then - I was going to show you - can't really see the nerve anymore - the nerve has fallen backwards. That's about it. You can see the rings of the trachea, and as you can see, the thyroid went pretty far down - I mean you know - we're all the way down here - well behind his sternum. That wasn't too far back there. Okay, alright you want to check your vagus now?
CHAPTER 6
Hey Josh - far left dial - can you move it three clicks to the right? We’re going to need the appendiceal I think - I think that white body wall is too shallow for you. He's got a deep neck - there you go. One more click to the right then. Perfect. Remember, he's deep. Perfect. Alright, so that's our positive signal from the vagus nerve, which confirms that the recurrent laryngeal nerve is completely intact. Okay, alright Josh, can we have head down and some positive pressure ventilation? Do you want me to go to the other side or - I’ll go to the other side. You’re going to stitch the lobe though - don’t forget, okay. Remind me we got to stitch other lobe.
Perfect. Okay coming up to - can you get to 40 I think? Gotta get retractor in place. Great, release. So we do this - it’s called valsalva maneuver, so that we're generating very very high venous pressure. So the idea is that if he's going to bleed, he does it here in the operating room where we can still see it. Oh look - there’s external branches of laryngeal. You guys see that? You don’t usually see that. That little nerve there? Should be the external branch of superior laryngeal - oh, here’s a bleeder. Bovie me - got it. And you guys can also see how high up this goes. I don’t know if you guys can get an angle in there - I mean, it's like way up there. Do you see how high up is upper pole went to? Good - great. Alright, another one when you're ready to Josh. K - release Josh. Thank you very much. We’re gonna take a break a little bit here okay. Take the baby rich and the prolene stitch.
Yeah, okay, so you going to put the stitch - put the stitching over there and then tie this off - should stop bleeding 0 and then you're going to run it as a locking stitch okay. Along the lines on the creases, and leave yourself a decent of tail cuz you're going to tie back to yourself when your run back up again. Snap. Okay. Alright, now you're going to run it and lock it.
Okay Josh - just because we're paranoid. It still looks a little wet up - think that might just be run down. Yep. Surgi-silk - immuno release. No problem. Pull up on the trachea since this is kinda - so you guys can see here - pull there for a second - he has a very wide trachea, which is very typical of a man, okay. This is only half his trachea - you can see how wide it is. Okay. So all looks dry down here. Thanks. Okay and bring the back back up Josh.
CHAPTER 7
And we’ll take a - we’re gonna need three of those vicryl stitches and then 1 prolene and histoacryl to close. Okay you’re looking for the sternothyroid, right? Okay, you’re right - you’re right. Yeah - disconnect all of them. Thanks Josh. You’re going to do a figure of 8 like last time. With large right thyroid nodule, benign - oh wait, is that the right one? Nope - sorry. Big bite. On FNA - Frank, Nancy, Alpha - but symptomatic. Please evaluate for malignancy. Okay, then I run the - what I do is I grab the deep cervical fascia, sternohyoid - sternohyoid deep cervical fascia, but avoid these anterior jugular veins. And you going to run it all the way down to the bottom, leave a gap at the bottom. Just watch the anterior jugular vein. You have some of this first deep cervical fascia. None that I see. Don't forget the deep cervical fascia. The more layers between you and the trachea, the better.
So again, deep sorrow faccia is now back together again - looks very beautiful. So we're not going to put the platysma together, and Joy if you can release the thyroid bag, I think the valve is on my side. We need a stitch for each of us.
So as far as nerve identification goes and landmarks, men are much easier than - yeah. Just a very shallow stitch. You don't to go so far deep. Men are - it's much easier, but they do tend to grow much larger nodules, and they tend to - for whatever reason - delay medical care. So the biggest ones I've ever removed, they’re always in men. And those are the ones, you know, where you have to split the sternum, do a mini sternotomy to get it out, and all that sort of stuff - they’ve had it for years - yeah. And they're huge, you know - they’re just big guys, you know, so you can even tell they have it. Right. But it’s nice cuz their nerve is big and trachea is big. The ones that are tricky are the ones where it's a woman with a large, multinodular goiter because you know it's going to be small nerve, and it's probably going to be displaced.
I think you also saw - it’s a good example in this case - of a 5 centimeter incision is plenty even though the nodule itself is more than 5. Still, I thought came out pretty nicely, and the key as you saw was the delivering it up, so it’s essentially - yeah - so it's essentially out of the wound. Okay. Sorry about that Jessica. Okay.
So this is histoacryl. It's kind of runny, so I put it on in layers and just slowly build it up and spread it out over the wound. Alright Josh, I'm going to take the drapes off okay. Let me know if I'm going to pull the tube out. K - needle’s coming out of the chest. Needle’s out. So we start with a 5 centimeter incision and we're ending now with a five - actually .5, 5.4ish incision, and that’s just from normal stretch of the wound.
So I think the operation went really well as you guys saw. We were able to remove the right thyroid lobe with a very large nodule in it and his isthmus segment of his thyroid very safely and with no complications.