Minimally Invasive Ivor Lewis Esophagectomy
Transcription
CHAPTER 1
In terms of the steps of the operation, we typically start every esophagectomy with an endoscopy. It allows us to assess the response they had to - to their therapy thus far, allows to assess any evidence of Barrett's esophagus and how high we need to go on the esophagus to get a clean margin, and allows us to assess the gastric conduit before we get into the abdomen to start the operation. We - we always begin with 5 laparoscopic ports. The most important initial step is to make sure there's no intra-abdominal metastatic disease that was not appreciated on the studies beforehand, and then we begin after placing our 5 ports, which include our liver retractor, by taking down the gastrohepatic omentum or the lesser omentum, getting in and identifying the left gastric artery and vein. We then mobilize along the right crus along the superior aspect of the hiatus and down on the top of the left crus. We then will come back - skeletonize the left gastric artery and vein. We sweep all the celiac nodes up with that dissection plane, but we do not transect the artery and vein until the end of this abdominal portion before we make our gastric conduit.
Once we've completed this dissection on the lesser curve, we move to the greater curve, we rotate the stomach up, and we get into the lesser sac through the greater omentum, preserving the right gastroepiploic, which is the blood supply that we're going to base the gastric conduit or the stomach that comes up in the chest off of. We move down our dissection, mobilizing the epiploic and the stomach to the level of the pylorus, and then we move up to the greater curve, taking the short gastric vessels, getting onto stomach at this point, and then completing our hiatal dissection circumferentially.
With that dissection of the stomach complete, we then will come back and divide the left gastric artery and vein, which preserves the blood supply to the stomach during a difficult dissection. We take down any retro-fundal or retro-antral adhesions, and with the stomach completely mobilized, transect the left gastric artery and vein, and then we're ready to make our conduit. I place another 5 millimeter port in the right lower quadrant, which I will use as a grasper.
As I mentioned intraoperatively, I will not use a jejunostomy in this patient. She's gaining weight, and if her conduit looks healthy, I'll move forward without. Some surgeons do insist on a jejunostomy, and we do that via a laparoscopic Seldinger technique - but we'll not do that in this case because I've almost gone completely away from using a jejunostomy in esophagectomies now. We create our conduit with this port. We come across the lesser curve vessels with a vascular stapler. We then create our gastric conduit about 5-6 cm in width, using multiple applications of a thick tissue stapler, and we move up towards our angle of His, giving a nice margin around the cardia of the stomach if there is any disease that extends across the cardia of the stomach, which she does not appear to have.
With this dissection complete and this conduit created, we then will mobilize the esophagus at the hiatus far into the mediastinum, we'll tack the stomach and the - the specimen together so that we can keep our orientation as we bring it up into the chest, and then we're complete in the abdomen.
A couple just technical points about the abdomen: one was the left gastric artery and vein division and the timing of such; the second is try not to do too much hiatal dissection early on as to not create a new - a pneumothorax, which could be troublesome in terms of blood pressure management, diaphragms becoming so much floppy in your face during the operation. So staying out of the pleural space until your hiatal dissection at the very end, I think is important. Once we've completed the abdominal portion of the operation, we will switch over to a double-lumen tube, and we will then turn the patient to the - to the left lateral decubitus. Over their right chest prepped and draped, we use a total of 4 thoracoscopic ports; 2 posterior are the operating ports, and the 2 anterior are a retractor and a camera port. And then I use a final very small suction port for a suction irrigator.
In the chest we again inspect for any evidence of metastatic disease. We begin in a very systematic fashion by taking down the inferior pulmonary ligament. We mobilize along the posterior hilum up to the azygos vein, which we then divide with a vascular stapler load. We then will sweep any level 7 or subcarinal lymph nodes as well as any level 9 or paraesophageal lymph nodes up with the specimen or harvest those separately but then move laterally, taking a swath of pleura over the top of the esophagus and mobilize the esophagus in circumferential fashion up to and above the azygos vein. We then will bring the specimen and the conduit up into the chest, again making sure that the conduit is in the orientation that we want wh - with the staple lying facing up in the chest, which means we haven't twisted the conduit as we brought it through the hiatus.
With the esophagus mobilized, the lymph node dissection complete, we perform an anastomosis where we transect the esophagus. We place an anvil typically of a 28 millimeter EEA stapler. Occasionally, I'll use a 25, but with most of these patients having locally advanced disease and some dysphasia, they often will have some dilation of their esophagus will accept - which will accept a 28 millimeter. I then secure this with several purse string sutures of 2-0 Ethibond using an Endo Stitch device. I bring the spe - conduit up, open the tip of the conduit, bring the staple handler - staple handle out, the anvil through the greater curve right above the epiploic, complete it with the anvil firing it, and getting back the final esophageal margin - the final gastric margin. Then we'll close that gastronomy. With this complete, we advance the NG tube. We leave some local anesthetic for rib blocks, irrigate drains, and we're done.
CHAPTER 2
We always do an endoscopy prior to proceeding with the operation to gauge the amount of treatment effect these patients have had. She's a young lady who had a locally advanced distal esophageal adenocarcinoma who received neoadjuvant chemoradiotherapy, and we scope to see the extent of disease, location of disease, any associated Barrett's esophagus, what the stomach conduit might look like, any extension of the tumor across the the valve or the GE Junction into the cardia of the stomach. Not - not a significant amount, maybe a little erythema there, little fullness of the GE junction - rest of the stomach appears healthy. You see a little bit of treatment effect at the cardia. Good, great. It looks healthy. So I'll have you put an OG tube in. So I'm coming back through her GE junction. There's her tumor at the bottom of the esophagus at about 35. Treatment effect ends at about 35, and we'll try to get a nice margin up towards 30 or 25. Great. Okay.
CHAPTER 3
So we tend to set our drapes up obviously above the xiphoid down somewhere below the umbilicus above the pubic symphysis just to give us plenty of room in case we do want to place a jejunostomy in the left lower quadrant. Most of our operation will happen from the umbilicus up, and we'll show you the port sites in just a moment when we get prepped and draped.
CHAPTER 4
We'll do that? Yeah. So we start with 5 laparoscopic ports typically. I typically will mark from the xiphoid and divide that into thirds, coming down. She has kind of a thin costal margin, compared to most patients, but we start with a larger Hasson technique - place port in the right upper quadrant. And then we'll explain where we put the rest of our ports as we move forward. Can I have the gas on, please? Yep. We'll take some reverse Trendelenburg, please. Needle down. Yep.
So we take a initial inspection of the abdomen just to look for any evidence of sort of undetected metastatic disease. By our restaging studies, most of these patients after their chemotherapy - well most - all these patients after their chemotherapy and radiation get restaging studies typically in the form of chest and abdominal CAT scans to look for progression of disease despite getting their chemotherapy. She does not appear to have anything of concern. So we use a total of 5 ports. We use two 5-12 or 12 millimeter ports in the center of the abdomen, and then we use two 5 millimeter operating ports under ea - either costal margin and another final 5 millimeter port far laterally on the right side for our liver retractor. So Mike's going to place his very low right sided port. Let's see. The liver is not terribly large, but nice and low would be great. Yeah, that's good Mike. See, the colon comes right up there, so careful. Can you raise the bed a couple inches for us, please? That's good. Drop your hands. Don't get that - yeah, good. Excellent. Get a 5, Asha. This'll be our flexible liver retractor that Mike's going to place next. Okay.
We got our first look at sort of the GE junction. Little unusual to have some adhesions there - probably from her treatment up to this point. Turn it over. I'll take those down. We'll place the rest of our ports now. She looks to have a nice gastroepiploic pulse. Most of the conduit is based off the right gastroepiploic, which looks very - very robust today. So Mike's going to place his next 5-12 or 12 millimeter port right here to the patient's right of midline again about - I'll take a short Snowden - about two-thirds of the way between the - two-thirds of the way down between the umbilicus and the xiphoid. Great. Can I have a sponge, please? And we'll place our final 5 millimeter subcostal port on the patient's right subcostal margin - enough to work below the tip of my finger. Stab. Great. Can you raise the bed another 2 inches? That's good. Any more reverse T available? 5, please. Thank you. Now, great. We try to keep the patients obviously in steep reverse Trendelenburg if anesthesia doesn't shortchange us a couple inches. Snowden, please. Harmonic. So again, in just the initial inspection of the abdomen, she's very quite thin - makes this - makes this a nice operation. Mike is to bring both hands up into the operating field.
CHAPTER 5
We typically start in a fairly uniform way. We begin by opening the gastrohepatic omentum here, which gives us a sense as to what's happening in the - along the - come back a bite here. Careful of the porta. So as - again, she's very thin. What's unusual is that - is she has some adhesions up here at her esophageal hiatus or the GE Junction, which I suspect is secondary to the radiation she's gotten thus far. This looks to be her left gastric artery and vein on the pedicle here. You can see we got a window. We'll tend to dissect that out next, but we're going to work up towards the esophageal hiatus.
Our sequence is opening the gastrohepatic omentum; and then mobilizing along the top part of the esophageal hiatus, taking these adhesions down and freeing up the esophagus; and then moving down the right crus, freeing up the esophagus along the right crus, which is over here, and skeletonizing the left gastric artery and vein; then moving towards the - hmm, a little treatment effect in that - make sure she doesn't replace something in there. I don't think so. I'll take that. Or is that a vessel in there? I don't know. You have a 10 millimeter clip applier if we want it, Asha? Unclear to me if she has a little blood vessel in there. I think we're going to clip that before we take that. We're sort of see a little - potentially a little thickened tissue - maybe a little bit of a feeding vessel here, which we're just going to clip and control. Could be a small replaced left but typically have not seen a lot of consequence in these patients with normal liver function, so we're going to divide that and move forward to our dissection over the hiatus and again take down some of these adhesions where the stomach is stuck.
CHAPTER 6
There we go. Okay. So just to get our landmarks: left gastric artery and vein, right crus, superior aspect of the esophageal hiatus, fundus of the stomach over here, left crus coming down, which we'll expose in a bit. So Mike's now dividing this tissue as we move forward towards our dissection across the top of the esophageal hiatus. Mike's just picking his way through. Typically when we're dissecting out the esophageal hiatus or any foregut operation, we're very cognizant of the location of the vagus nerve, especially this anterior vagus nerve. It is not as essential; we're looking more to get a nice margin on the cancer and to make sure you have a nice dissection plane. And we tend to sacrifice the vagus nerve anyway, so it's not a big concern. Again, she's had a lot of treatment effect. What I mean by that is she's gotten neoadjuvant chemoradiotherapy in the treatment of her esophageal cancer, and so what we have found is that there's varying degrees of adhesions, fiber - fiber - fibrous tissue, after the completion of the...
CHAPTER 7
So with our esophageal hiatus sort of dissected in two, we're going to move to the right crus. Mike's going to grab the right crus. He turns sideways and - do the best you can to grab that. Good. And hold that over, and we're gonna open up along the esophagus here. One of the points we try to make early on in the operation as we move and dissect at the esophageal hiatus is not to get into the pleural space if we can avoid it. Sometimes, you do enter the right or the left pleural space, and I like to avoid that as it leads to difficulty with the pneumoperitoneum, little pneumothorax, sometimes some hypotension, which could make the operation somewhat more - more challenging than it should be. Very stuck, and if you do see it stuck like this, we don't hesitate to take a little bit of the muscle of the crus to get a nice margin on the tumor. We want to be able to get in the dissection plane that - that we're able to work in safely.
Structures at the hiatus that we worry about - we spoke about the vagus nerves, which are not of concern because we divide those in the chest anyways. Posteriorly and at the inferior aspect of the hiatus, can run - it - it runs the abdominal aorta, and when someone's received significant neoadjuvant therapy, that can be rather adherent - so we want to be careful we don't run into that at all costs. And we talked about the pleural spaces and trying to avoid the entrance into the pleural spaces at least early on. Later, as we complete the dissection at the hiatus as our final step in the abdomen, we don't necessarily concern ourselves with entering the pleural space at that point, but right now I'd like not to do that. You can see we've got the esophagus, significant treatment effect, right crus, superior aspect of the hiatus.
CHAPTER 8
We're going to move to skeletonize the left gastric artery and vein, and the move here is that Mike's wand is going to lift up where I'm holding. We'll have to get down low and skeletonize this pedicle. Lift up. There you go. So we're hoping to stay a little bit lower and turn a little bit more clockwise. Lift your left hand up straight up in the air. We're just opening the tissue along the pedicle at the left gastric. We can see the left gastric vein is always or typically runs inferior, and the artery runs superior in the pedicle. This is the vein. Artery's up here. Splenic artery coming off the celiac axis, going off towards the spleen - that other structure to be named later. Mike's gonna go a little lower than that, and he's going to take this next bite here as well. You can see there's some nodal tissue right as Mike leans there that we're sweeping up with this pedicle, and this'll tend to be divided with a stapler - but we don't tend to do that at this point in the operation because we've got some work to do on the stomach, which involves freeing up the greater curve of the stomach, taking the short gastric vessels. I like to keep this vessel intact and divide this later after - after I've completed my greater curve dissection as to not to devas - devascularize the stomach early on.
So now we're going to move to little more dissection up here. So Mike's going to lift up on some of that tissue right there at the top of the - of the pedicle. There's a nice plane, so stay down lower. Good. Again, we try to skeletonize towards the base of the left gastric down towards the origin of the celiac. Here's our dissection as we had completed earlier from our right crus. Now lifting that up in the air, I think we're ready to divide that out of space with all this nodal tissue going up in the air at that point. Good, and there's their splenic coming off the celiac. We'll be dividing right above the splenic at its origin.
CHAPTER 9
Now we move to the next step in at least the way we perform this operation where we move to the greater curve to find a window into the lesser sac. She's got a sort of redundant appearing stomach here. But again, she's nice and thin, so Mike's going to try to grab a big bite of the stomach. He's going to take it - no - down to the tops of those vessels, not including them, Mike - up, up, up. That's not erupted, but with a nice wide bite, let's not develop any serosal tears.
And now we're gonna look for a window into our lesser sac, which she presents quite nicely. You can see a pulsating right gastroepiploic as we work through this portion of the dissection and a very nice thin window to get into the - into the lesser sac and divide the greater omentum. This can be a very challenging portion of an MIE. In fact, I think can be one of the more challenging, especially in some of the obese patients that we see - find the right window into this - this portion of the abdomen and this portion of the dissection. We tend to work sort of from the midpoint in the stomach and move - move little inferior and a little superior. Stay just a touch towards me. There's a fine line in some of these patients in terms of where you get in and how much omen - greater omental fat you drag up into the chest and - and then how close you get to the epiploic. Yep, and so we're just moving up along the greater curve, preserving the epiploic that you can continue to see pulsate adjacent to the stomach. What we tend to look for next are - here's just redundance - some short - running into some short gastrics.
There's often a window where the right gastroepiploic ends and the short gastrics begin, which we have not reached yet. Want to move his hand up to get a better bit of exposure here? Let go with your right hand. Take your left hand and grab that right there. Again, the principles of manipulating the stomach are big wide bites to hold it, not generate serosal tears, coming down to these vessels that come off the epiploic - to not interrupt those - and I think what we're seeing here is part of the epiploic ending and probably a window starting right about in here with some short - shorties starting to show up up in here. So we're coming up to what I suspect is our first short gastric here. Mike's going to give a little more tension towards him and towards the feet, and at this point, we like to jump right onto the stomach. We have not come across an epiploic as far as I can see. You're in some thin tissue here. We can take the short gastrics, and I'd like - once we start taking the short gastrics, we stay on the stomach, dividing these and find a nice plane, because this is where we tend to put our anastomosis. So there you go.
Sometimes, we take the shorties on slow, and sometimes we take them on fast with our harmonic scalpel. I haven't really found a big difference between the two. I'm going to have Mike move his hand up now. But part of the reason that we haven't taken our left gastric artery yet is because of this portion of the dissection. To work on a stomach that has the blood supply is somewhat compromised already and we're manipulating it doesn't make sense to me, so we keep that - that intact until we're done with this portion of the dissection. All set. Mike's going to give him more traction towards him, and we're continuing to move up the greater curve, taking the short gastric vessels as we do that. Ultimately, we'll get to the left gastric - I mean - yeah, probably the left crus.
I'll keep working up here. It's a little stomach being flipped back underneath. Boy, big redundant stomach today - plenty to work with. Towards you just a smidge, yep. This can be variably difficult as you come up along the greater curve to the splenic hilum in terms of how tight this tissue is to the splenic hilum. Mike's going to give a little more traction if he can. There's a shorty in there. That's it, Mike. Stay right on the stomach, and we'll move carefully. I have to re-grab. Yep, re-grab there. Yep. That's it - towards you. Gentle. Okay, I'd like you to gently grab the stomach here. Aim towards you. Yep, turn it over. I'd keep that insulated tip down towards the tissues. I know the curve of the instrument may not be exactly favorable here, but it's more important not to burn anything with that very hot ultrasonic tip So now we've mobilized the stomach off the spleen. We're again working back towards our left crus. We'll - we will meet our dissection up top. A little more traction towards you - gently. As you can see, there's our dissection coming across the top of the hiatus. Here's our dissection coming from the greater curve along the left crus. This is the left crus we're exposing here. I'm tenting this tissue out to give Mike the proper plane, and here's our left crus, which I'm tenting out. Again, we emphasize not to get into the left pleural space - not a disaster if you do eventually but trying to avoid it now to keep your anesthesiologist happy and us happy.
Okay, that's a little - so I'm going to gently have Mike reach over and grab the back portion of the fundus here. Again, gentle bites, big bites - no serosal tears. I don't mind if he drops this periodically - not true - let's not traumatize it too much, but I want to get this stuff down as we move towards the last bit here. Mike, lean right in here. Again, we're just working stomach esophagus off left crus. There you go. Continues to work to make that dissection plane there. Yep, cut towards the stomach. Good. And again - finish it up there, Mike. Yeah. Excellent.
So with this portion pretty complete - and we'll come back to doing a little bit more of that in a bit - we're going to move back to the anterior aspect of the stomach where we had stopped our greater curve dissection. This is the part where we were preserving our right gastroepiploic. You can see our dissection plane here. Try to carry this dissection down to the level of the pylorus typically. I don't tend to kocherize for an Ivor Lewis. Careful with your bite size. I think this can be a tricky part of this operation as well. Pancreas here. That's it. Little higher up. Finally, we're going to put the stomach up. The back portion of the fundus of the stomach allows us to take some of this - adhesions down here as well - thin - staying away again from the epiploic as best we can. More thin adhesions. Pancreas right there behind us.
Okay, so I think that looking at her, I think her pylorus actually is right about in here. Do you agree? Agree. And one of the tests for the - for our mobility of the conduit is whether the pylorus will reach up to her right crus, which it clearly does, so I think at this point, we're done with our greater curve dissection. Looks like we have a nice pulse that extends up on our gastric epiploic. Looks like we've freed up the upper portion - very nice pulse that extends up, extends up, extends up - and we have our dissected out greater curve where we'll put our anastomosis. We've done very little trauma to the stomach as best we can - try to manipulate that as gently as we can.
CHAPTER 10
So now with our greater curve dissection complete, I think it's now safe to take the left gastric artery and vein, which we've preserved during this portion of the operation to - again, to help the - the stomach recover from a difficult - sometimes difficult dissection. We use a vascular stapler load. Turn it over. Mike's going to lift up right here to take this portion to the stomach. There you go. The tip is on the other side - yep. Good. Okay, want to take that? Yep. This is the division of the left gastric artery and vein, which again gives us more mobility of the stomach, and there we go. So now what we'll do is a little bit more dissection up into the mediastinum.
CHAPTER 11
We like to have, again, a little bit of esophageal dissection to get everything down into the abdomen when we create our gastric conduit in the stomach. Lift up on this - lift up on the divided left gastric artery and vein staple line now is our typical next move - and up. So he's cleaning up these sort of posterior cardial stomach attachments. What we can see here is the left crus, the right crus, the stomach with significant treatment effect, completely mobilized fundus of the stomach - pull down now - which actually looks quite good, and we'll - we're going to do a little bit more dissection at the hiatus after we've done our conduit creation. Let's look back at out lesser curve here, take a little bit of that stuff, preserve a little bit of the right gastric. Why don't you lift this up here? There you go.
CHAPTER 12
These are some thin adhesions Can you show me my trocar? Sorry. Thin remaining gastrohepatic omentum type tissue - and let's make sure we've got that completely done. Great, okay. So I think at this point, we are ready to do our conduit. We put another port, so we have 5 laparoscopic ports. We put one more port in the right lower quadrant. This port is about a hand's breadth directly below - hold the camera - got it - hand's breadth directly below the one at the midclavicular line, which gives us a moment to speak about the jejunostomy.
CHAPTER 13
I have not been putting jejunostomies in the majority of these patients who again are nutritionally sound. A 5, please - can we get a 5? Just a 5 for that? Yes. Who are nutritionally sound and whose conduit appears healthy. I can always come back and put it in later. If they're failing, I find that it creates more harm than good at times. Although for many surgeons, a jejunostomy is part of their practice for esophagectomy. Okay, thanks Asha. So our first in creating the gastric conduit this - the lineup is the operating surgeon's left hand is through our subcostal port, the stapler comes through his operating 12 millimeter port at the right midclavicular line, cameras through the left 12 millimeter port at the left clavicular line, and then I'm operating through this port. So staples are going through the operating surgeon's port here. He's going to lift up on this - on this lesser curve omentum, and we use a vascular stapler load to divide the vessels along the - divide the vessels along the lesser curve.
And so we want to start. If we look here, here's our pylorus. Here's sort of the antrum of the stomach. We're going to come across. Here's our - probably our right gastric comes up in through some this. We're going to come across a portion of this and get on the the stomach right about there. Do you agree with that, Mike? Agree. Again, Mike's goal is to - Yeah, are you happy with that? Open, yeah - just come up a little bit more. A little bit up - good. It comes right onto the wall there. I agree. Take it? Yep, take it. The pylorus again is here. Jumping on about a third of the way up - great. Now we use some thick tissue stapler loads to create the rest of our conduit. This is a coordinated 3 person team effort - Mike, take the camera for a second - where the operating surgeon continues to hold the lesser curve side of the stomach and the two assistants - one will hold the greater curve up near the short gastric vessels at the top of the epiploic, and one will hold it down. This allows us to square up the gastric conduit - square up the gastric conduit, put it on a little bit of stretch - and hold this for a second here, Asha - and keep things straight.
So our goal is to keep our staple line straight to the - our staple line straight to the greater curve. Close. Happy with that? Yep, good. Try to keep our conduit about 5 to 6 centimeters in width as best we can. Yep, great. Mike, take the camera. Do you want the camera? Come in. Come up. Keep it straight up and down. So I'll move my hand up along the greater curve here. We'll move Asha's hand down here just about there - there. Happy with that? Happy. Good, take it. So I keep moving up, again grabbing along the greater curve. These are our divided short gastrics. I'm trying to keep things straight. Pull back, Mike. Show me this. Not twisted, not spiraled. I'm going to stay a little bit off the - off the cardia. You can see almost a demarcation of where the treatment effect and where viable stomach is. So Mike's going to come right up along this port here. We tend to throw away little bit of the top portion of the stomach. Yeah, that's good. Yeah. And we're just marching up, creating our conduit. Even bites. Good. Great. Okay. Yep, great. Thanks Asha. So we've got one more bite to go. Take her off completely, Mike.
We'll finish this up up here. Looks nice and healthy. We'll have plenty of stomach to work with. We'll go as high as we need to in the chest. Mike, hold the camera. It's a thinner conduit than typical today. But she seemed to have very vibrant pulse, and I want to stay away from this very treated cardia of the stomach. Again, we'll probably make our anastomosis out here somewhere and amputate a little bit of this redundant stomach. Yeah, right there. Yeah, you can take one more, Asha. Yep. Now - good, Mike. Stop for a second. Straighten it out. Okay, so we have one more bite for our gastric conduit, which looks healthy today. Push up. Yeah, good. Great. Yep, I see my tips. I think we're good. This is the last one. Great. Here's our conduit - looks very healthy, looks very redundant, looks very mobile. I'm very happy with that today - looks quite viable right up - and our pulse comes right up to where we finished, and there's our window. There's where we took short gastrics. We have a very good looking conduit.
CHAPTER 14
So now, as we talked about, we'll do a little bit more dissection - hermetic please - at the GE Junction, so this is to mobilize this - the stomach and esophagus up into the chest without the concern of a - of a pneumothorax or getting into a pleural space. Mike's going to hold the right - the right crus little higher up. I'll pull down on this - gee, you see there's very treated esophagus. Mike's going to take a little sliver of that muscle that's going to come with us today to get us a margin around - get us a margin around the esophagus at the hiatus - maybe not the biggest bite but keep mobilizing - we're just going to mobilize circumferentially up into the chest, and there's - it just released. There's a little bit of the left crus poking into view there. He's going to divide just a touch of that. Good. And I'll take the stomach and lift it up this way. Mike's going to take a sweep.
So what we can see with this picture is the pleura. Mike's sweeping the pleura, that little white fine line there, away. We're thinking about the abdominal aorta or the aorta at this point. Sweep. Then taking down these adhesions. Dissection - thin flimsy stuff. We're sort of above an area of treatment. There's the - as we just discussed, there's the abdominal aorta as we come through the esophageal hiatus. It is close and can be rather stuck if - if the radiation is - has been a little bit more aggressive. In this area, we got sort of got abdominal aorta, we've got pleura that we're sweeping back, and Mike's carefully dissecting that off and mobilizing the esophagus into the chest. Sweep. Again, a nice view of the pleura right there - very nice view of the pleura that he's going to dissect off. Not a big deal if we get into the right chest - we're going to be in it in a matter of minutes anyways but makes for a cleaner operation.
Mike's now going to grab the esophagus and stomach here. Yeah. We'll do a little bit of - yeah, bit of anterior dissection here. Here we are at the superior aspect of the hiatus - got the hiatus up with my grasper. Mike's pulling hard with his left hand. He's sweeping now to expose tissue, dividing it carefully - not terribly concerned about a vagus nerve as we're taking a wide swath of tissue at this area. Sweep, sweep, sweep. Great. Pull towards you now, and here we are working along our left crus. I would like to stay out of the left pleural space if possible. I'm gently retracting the left crus over towards me. You're taking out aorta - again shows itself right there close to the esophagus and... Great, and there you go - one more bite. Things are reaching above where they had actually radiated the patient, so let's go - maybe another little bit of mobilization here. What do you think Mike? Yeah. We can get that pretty easily. Yeah. Great. Sweep. Sweep. Great. Okay, one more - one more hand at - up at the hiatus there. Wow, lot of treatment effect there, yes. I'm gonna have you take it one more time towards you.
Asha, we'll need a 0-Ethibond at sort of 18 centimeters. Towards you. That's the suture just to tack this conduit to the specimen. Great - that thin bite right there. Okay. Great, so what we can see is we've got a celiac axis, which has been divided basically at its base. We've got a preserved splenic artery there, preserved common hepatic artery there, left gastric's been divided right at its base - a lot of treatment effect on the distal esophagus into the the cardia of the stomach, but we create our conduit to preserve that and to save the - what appears to be the viable stomach and stomach we've used to reconstruct the esophagus. We have a very thin nice conduit today that does sort of replicate the size of the esophagus, which is our goal. We've got a very nice gastroepiploic pulse along the greater curve here. I don't feel as though we've twisted or spun the conduit in our creation.
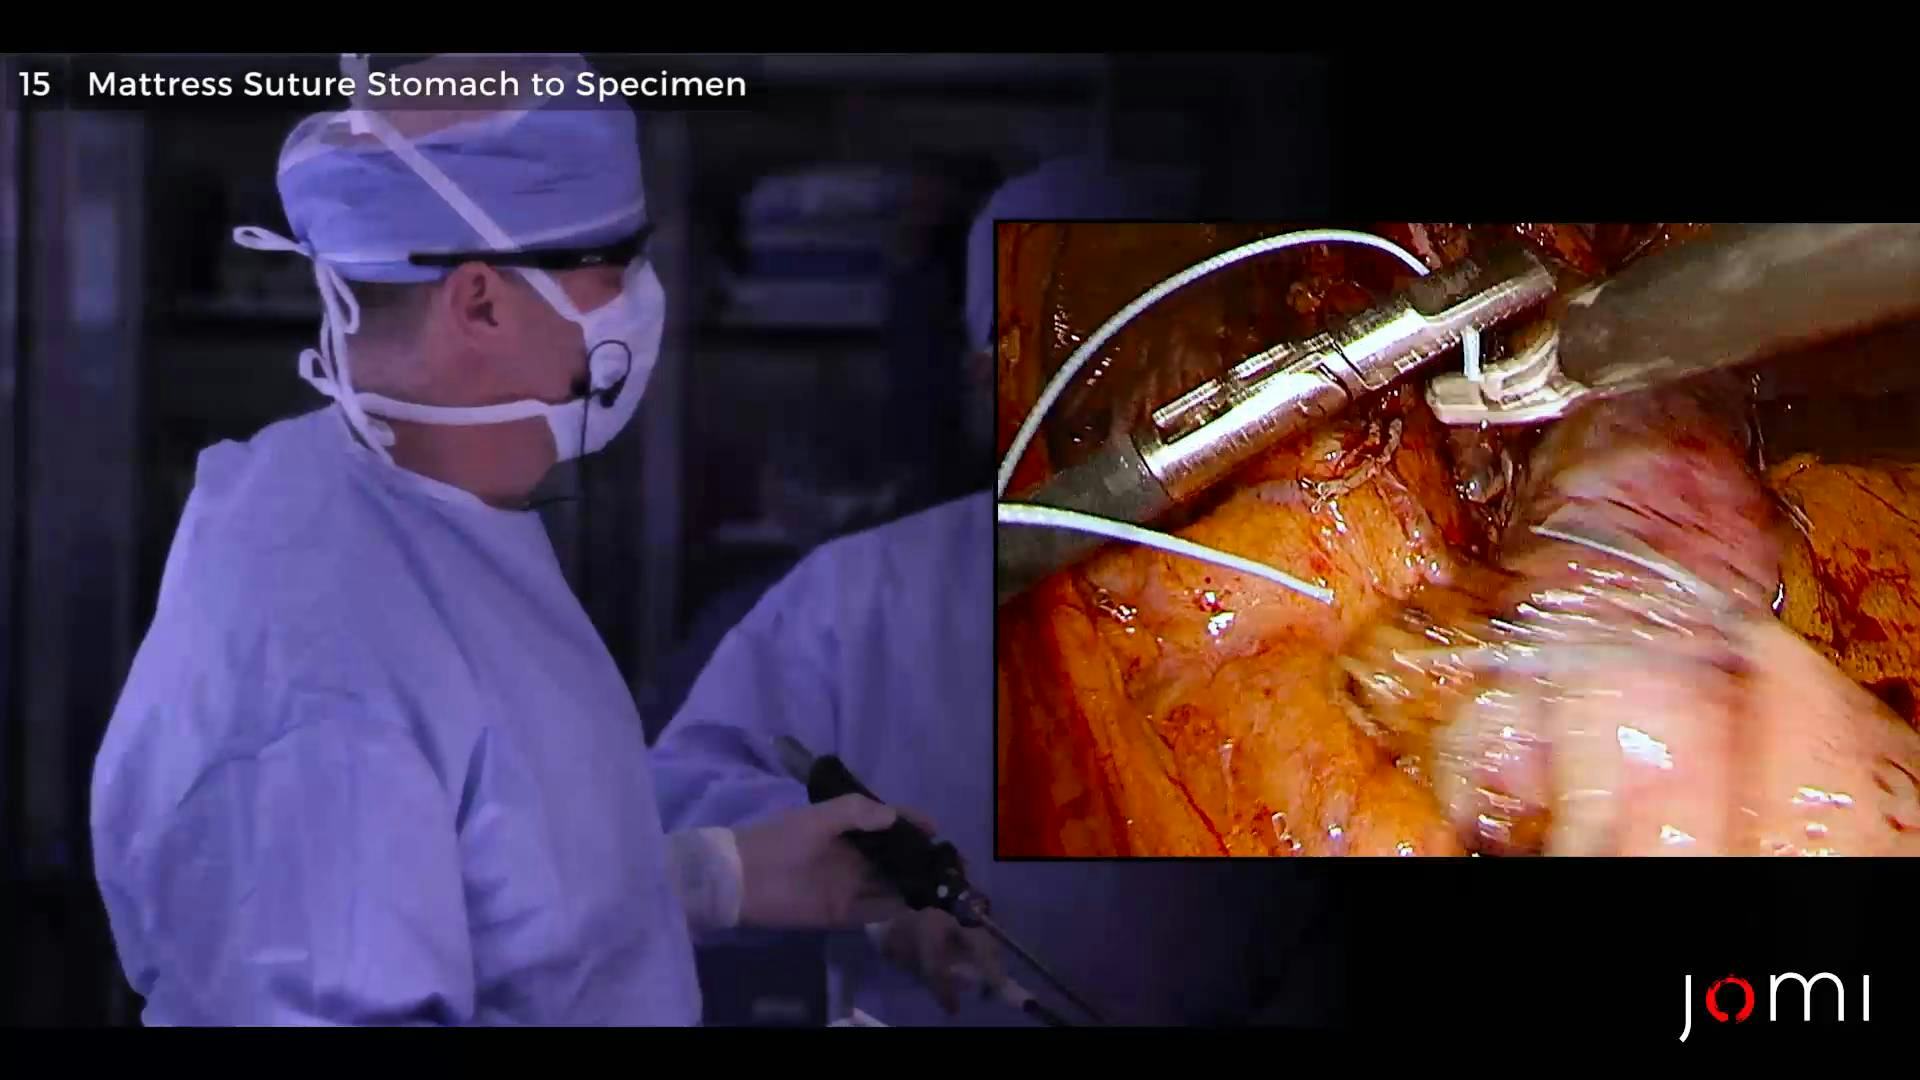
CHAPTER 15
And so with this complete, now we're going to tack these two together, so I bring them up into the chest. To do that, we put a mattress suture in the top of this conduit, which is right here to here. Yeah. A little - yeah, that's good take that. Yep. And now way down. Yeah down, down, down. We do a nice wide mattress so we can keep things oriented in the proper way. And now you're going to go down and go up top to bottom right to the tip of this here - great. So we've got the... greater curve of the stomach to the divided conduit, which I think will again help us to bring this up into the chest in the proper orientation, which is critical we don't want to spin or - nice. Okay, well... That's about the abdominal portion of the operation. Any thoughts, Mike, you want to share? I think her anatomy made it pretty easy for us today, relatively speaking, and I think the pulse is good in the epiploic. And I think a - lot of stomach to work with - we'll have plenty of conduit to bring up into the chest - good.
CHAPTER 16
So we're going to close our ports, and you guys want to make sure you see the port placement. I think that's a really critical. You can lower the bed now, Marcus, too. So Mike, why don't you - just to - just to - to show you what we - that's good. Lower it down now.
CHAPTER 17
[no narration]
CHAPTER 18
So this is the tip of the scapula. That's where we sort of base our port set up off of. These are the two surgeon working ports in the posterior part of the chest or the back of the chest. There's a sort of prominent rib, which is probably about the 8th inner space right there. This is our camera port here. This is our retractor port here, and this is a small suction port here. Surgeon works through these two ports, camera through here, retractor through here, and a suction - a suction irrigator through this port to help with the dissection. The typical - about 5 port setup. We start with our camera port, which is this one here, to get into the chest initially.
So we'll take a quick look in the chest with the nicely isolated right - right lung. Right over this rib here, so I'm right there, Mike. Move further back - yeah. This is - eventually this posterior - this posterior inferior port is the one that we will enlarge at the - that second - step in the chest portion to help with our anastomosis and anastomotic technique of stomach coming to - together with the esophagus. Spread, yep - there. Good. Okay, Mike's going to put a second working port - probably right about here. So we put our retraction port - this is our sort of a fan retractor that we use to retract the lung. I put that sort of over the confluence of all the fissures. Yep. And we also will use this port for a portion of our anastomosis. I need a liver retractor. To hold the fan retractor, we use a second liver retractor. This is in lieu of a medical student or another resident coming to help us. So where I use the liver retractor to elevate the liver - this is a liver retractor in that I use to hold the fan retractor, which then holds the lung over. You'll get a view of that in just a moment.
So just to get us a little more exposure, Mike will take a Ethibond suture on our Endo Stitch device. She does not have a terribly elevated liver, and we probably could get away without doing this today - but we'll show the technique as I think it's an important one for sometimes a difficult chest. With Mike's left hand, he'll lean on the lung, and I'll elevate the central tendon for - for Mike. He's going to put a bite through that. Go back in. We'll take a second bite just to mattress this suture. Great. And now we use a fascial closure device to make another incision. We use this little - this little piece of equipment, which is something you would close the fascia in the abdomen, but we use this to grasp the sutures, so Mike will come into the chest with that right over the costal margin and reach up with that. and grab the two sutures. Got it. Good. Snaps coming off. Yep, and dry those two out.
So we bring those through the - to the chest wall down low. Keep going. You got both of them now, and then by putting a little traction on those, we can retract this diaphragm. This is the fan retractor - help retract the lung over. That's it. So this helps expose the esophagus and the esophageal bed might - come, Tim, down - take a look - and you see the esophagus running up in the chest here. Some subcranial nerves - and a little higher up on the chest, I see the azygos vein, which we'll end dividing today at some point.
So the final port is this little suction port, which is in the anterior chest between our camera port and liver retractor - or fan retractor. Okay. Hold this for a second too, Josh. Come back to me. Good. Okay, so our set up again is the operating surgeon has the - the ultrasonic scalpel. He's got a grasper in one hand. I'm suctioning as the assistant for my side of the table - we have a fan retractor through another port exposing the esophageal bed, and our initial step was to take a look around the chest.
CHAPTER 19
We saw no remnants of intrathoracic metastatic disease. So Mike's going to reach down. He's going grab the left - part of the right lower lobe. Lift this up, and we're going to take down the inferior pulmonary ligament on this side.
This begins the dissection in the chest. What we look for in terms of margins around the esophagus, we look to take down this. We find the pericardium medially. We try to find the contralateral pleura or the left chest pleura deep, and then the area is our - is our lateral margin. So Mike's just working through a little bit of radiated tissue here. This is probably a little bit thicker than it usually is. And we probably will very soon get into our dissection that we've done up into the chest from the abdomen. We tend to do this dissection first - the medial dissection along the posterior aspect of the hilum. Stay up on there just a smidge, and there's our dissection plane from the abdomen with a little bit of fluid coming through it. And I'm constantly sort of pushing tissue, suctioning because there's no insulation that we - we use no insulation in the chest, so I can suction liberally, which helps evacuate the smoke and helps evacuate the blood as we do this dissection or any fluid in the chest. So Mike's got this pretty much down. We don't run - we do not want to run into the inferior pulmonary vein on this side. We can begin to transition our dissection to this plane here. There's our esophagus, this is the pericardium, and here's the thin tissue we're going to take down in this region.
Then we'll keep moving north - again, finding our medial plane. Yeah. Again, we're going to take these subcarinal lymph nodes. We're going to gather up any paraesophageal nodes that we see. We - we typically will come back. Mike, wants to avoid this structure right here. You can faintly see it through the pleura, which is the right mainstem bronchus as it comes down, but we're going to aim up little bit through here. Stay up towards me, and we'll come back and gather up some of these level 7 or subcarinal nodes in a moment. And we're just taking some of these thin vessels here that feed the esophagus. Again, we'll come back and complete the nodal dissection in this area once we have this opened up. Mike's going to open up the pleura right up to the esophagus. Away up to the azygos vein, pardon me. Go - that tissue right below it there. Great. Great.
Again, we're very aware of the airway and concerned about the airway and trying to stay a little bit away from the airway. We're going to finish up our dissection inferiorly. Now towards you - no, towards you for a second.
We're just going to finish up this little bit of tissue here to connect these two dots - yeah, that band right there between our abdominal dissection and your chest dissection. There we go. Great. I'm on the heart. Let me know if that's bothering her. I'm pushing on the pericardium. I'm pushing on the heart. We got a nice medial plane. Mike's going to continue to thin this out - take these thin bands. We do as much dissection before we bring the specimen and the stomach up into the chest. We try to his much of this dissection as we can - keeps things cleaner and little bit easier to work with things at this point than it is once you get it up in the chest. So for the lateral part of the esophageal dissection, we tend to grab the center of the esophagus.
I take to take - I tend to take a small swath of the pleura in this region. So we'll start here - open this up. Let's stay off and right on the edge of the esophagus there, trying to avoid obviously the thoracic duct. I do not tend to prophylactically ligate that. Some - some surgeons do. I do not. A little vessel in there - so back here now. That's it.We're taking these thin bands on the lateral aspect of the esophagus as we sort of circumferentially dissect around it. We're going to keep coming up through our pleura here. And take a little piece of pleura with the esophagus, and we're going to connect to a previous dissection right about up there. That's it. That's it. And continue just to take thin bands, which mobilize things, making it easier once we get our specimen up. Take that band. Hold this right back here. Excellent. Good. That's it. Great. Nope. No, don't worry - keep working our way up until we see it. Yep, Mike's going to finish up this dissection - again, taking the pleura and the esophagus off. There you go. Yep. Excellent. Think we'll take the azygos vein today. This should be...
CHAPTER 20
So we'll do that now, so Mike's going to come up and lift up in the azygos vein with his left hand. You said 30, right? 30 curvature, yeah. Just like that, and I'm going to do a little gentle sweep as you see. I see our esophagus running underneath it. Put your tips through there, Mike. Sh - little, gentle sweep. Good. Take a stapler. We will pass a 30 millimeter vascular stapler through his operating port inferiorly. Open. And I will reach in to help open the tissue on the other side. We'll open up pleura first. Now we'll straighten it out. Slide it up. Close. And take that. Great, so that just gives us a little more room to work around the esophagus and complete our dissection. I think at this point, we mobilized laterally, we mobilized medially - think we're going to bring the specimen and the conduit up into the chest, and - I'll take a Snowden. You got it?
CHAPTER 21
And see what we have - maybe we'll do a little more dissection before we do that. A little bit more of this stuff here up on the esophagus - right there. Those things are exposed. We'll just divide them. It helps again with our mobilization. Keep going north. Mike's going to take the specimen. He's going to take the harmonic out. Grab another Snowden with his other hand. Right. And we're going to bring the conduit up. No, you grab the specimen here. And that appears to be in the proper orientation. We want the staple line to face us or facing up so that way we know we haven't rotated the conduit to any degree. It looks healthy. It looks viable. And we'll have Mike divided the stitch between those two, and this is the stitch that we placed in the abdomen to connect the two. Divided - great. Grab the specimen there, Mike. Senn, please. This comes down. This stitch comes out. Thanks.
CHAPTER 22
And now we'll continue to circumferentially dissect the esophagus as we move up into the chest. Excellent. Excellent. Excellent. Once you get to a certain point in the chest, reflecting the esophagus up is not advantageous, and what we found is letting it go and operating with it down and then manipulating it like such so the specimen and the stomach is down, and we're lifting the esophagus up. Rather than having the whole specimen and cardia of the stomach up here rotated over, we tend to keep that down and mobilize just the esophagus up here. It's a little bit easier to work with less in your face. And you mobilize right on the esophagus with small bites, controlling this dissection. There's your airway right there. Flip back towards me now. We'll circ - we'll work a little bit circumferentially around this. Back towards me. That's great. Small bites. Have you tried 28 today? I think so.
And Mike's - again, just circumferentially dissecting the esophagus a little bit into the chest here. We're at the azygos where we dissected - where we divided it. It'll be nicely small bites - not to get into the wall of the esophagus - not to myotomize it to any degree. Okay. Small bites. Stay up on it. We want to get a little onto it. Sweep. Okay. We're either at or above the azygos, so we could probably go just a tiny bit higher in the chest towards me to touch there. They got so much stomach today. I think. Yeah, there you go. Small bites. That's it. And just a little tissue on tension, a little division, a little sweep. So I think we're very far above the area where she had cancer and treatment. I think going a little bit higher in the chest may give her a slightly better functional result in terms of diminishing them out of reflex that she may have afterwards, which all patients do suffer with to varying degrees.
CHAPTER 23
This next bit will be - this is subcarinal space. You can see here we have right mainstem, left mainstem, and the subcarinal package here. We'll plan to clean out some of these nodes here, carefully. Lower, lower, lower. 7. Take that off. Good. We'll take it in just a second there. Let me... Hemostasis right there. Watch your tip in there. That's up. Open and shut this little bit of node here. Yep, small bites. Come across the base of it now. Think - you're always thinking about the airway in here when we're doing this as best we can. Morse - well, we've got our esophagus dissected out. Can I have a Snowden please? The airway was skeletonized. We've got our azygos vein divided. We got a healthy appearing conduit up in the chest, which appears to be in the proper orientation to put it back together st - again, staple line facing up, greater curve facing out.
CHAPTER 24
So we're going to do a couple more things now to - to get ready to put things back together - stomach back together with esophagus and resect the swoop. We increased the size of a posterior inferior port. This is the one the Mike's been working through most of the case. Turbo. Now 5 to 6 centimeters in length. And this is the one where that we're going to remove the specimen through and - I'll take actually a big Weitlaner - and perform our anastomosis through. Thanks. And we just open up this incis - the same incision that he made initially to put his port in. We just open that tissue up. Open up this incision - we're taking a little bit of the intercostals off of the rib space - give us a nice working port. We try to avoid a rib spreader and - and hopefully a lot of manipulation of the chest. I think that looks pretty good. Mike, what do you think? I agree. Just open up this inferior port to about 5 or 6 centimeters. That's the one we're going to take the specimen out through and the one we'll put the staple handle through. We use this simple wound protector as - you know, as to hold the soft tissue open, and I guess for a little oncologic barriers, we drag the specimen out through the chest wall. And this just sits flush and helps this stay - spread open. One more turn there. Alright. Okay.
CHAPTER 25
We're ready to transect our esophagus. The anesthesia team will be ready to pull the OG tube back as soon as they see it. Hold this for one second, Josh. We're going to re - redose our paralytic a little bit because I see the diaphragm starting to twitch a smidge, and we like everybody nice and still for this part. So Mike's going to pick up. To divide esophagus, we tend to like to figure out a couple things. We one want to be far above the area that we are interested in, which just comes up. You know, here's our treated esophagus, cardia, stomach. We're going to be up here somewhere. I like to have about 2 centimeters below the last edge of dissection to allow us to put the anvil. We use an EEA stapler to put things together - so two centimeters below where our dissection plane ends, and we divide the esophagus right here, which allows us to rotate tissue onto the anvil with the stapler.
To complete this portion of the operation, Mike has grabbed it with two graspers. He's grabbing the top side of the esophagus with his left hand. He's reaching down and grabbing the bottom of the esophagus with his other hand, which allows him to provide equal pressure on the - on the esophagus as we transect it. And I'm going to take scissors through my operating port - or the suction port over here. Endo Shears, Asha. Up in the air - just to there. Okay, let's see. You think right about there? Yeah, I do. Little more traction - Mike's going to provide gentle traction towards the feet as I transect the esophagus.
Now, this will not be our final esophageal margin. We have another probably a centimeter or a centimeter and a half as we get higher up on our anvil. I'm trying to get the muscle, and I'm trying to get through the mucosa here. This all appears normal - not through the mucosa as of yet. Try to be a little careful - I have in the past cut the NG tube in half - always a bummer - and not necessarily a crowd-pleaser. And again, like all these things - a little - little top, little bottom where it opens up, where it seems to be easy. Little more traction, Mike. Pull your NG tube back now please, Connie. And she's going to pull that back in her direct vision, and then she's going to go another 7 centimeters beyond that. So another 7 centimeters - more traction, Mike. Take it off the chest wall a little bit there. Keep going. Okay. Great. So Mike's going to let go with his - no. He's going to let go with his left hand, and he's going to reach in through our open operating port and grab the end of the esophagus.
CHAPTER 26
There he goes. Reach - okay, great. And you pull that out through the - through the access port that we have and try to hold that to c - limit the amount of contamination that we have when we take it out. Great. The stomach and esophagus for permanent pathology. Mike's going to open the tip of that just to take a look at it. Heavy scissors in the tray up here, please. Might be a 25 - we'll see. Smaller here. Great. Good. That's treated, but the esophagus - you know... So with this on stretch, I think we have - 5 centimeters? Good. No, 7 at least, I think, yeah. Okay, great. So that's for permanent pathology. Okay, that can go. These instruments will stay here. Yeah - yeah, I think so.
CHAPTER 27
So we're going to set up an anastomosis. The first thing we need to do - I do this, again, with an EEA facing the anvil within - hold that - the anvil within the esophagus here. And when we come in, we'll grab this 180 degrees apart. There's our transected esophagus. Nice and healthy and bleeding and... I want to get the mucosa to pout a little bit in addition to the muscle. Good. I'll take the anvil, Asha. I'll take another Snowden. Okay, then we'll see if we can get a 28 to fit today. Most often, we are able to use a 28 millimeter EEA. Mike's going to help hold that in place to touch there. Looks pretty good. Yeah. Slide it up just a touch more. Great. Let's make sure you got mucosa there. Hold on to your side.
Alright, so now we'll baseball this into place. We're getting the mucosa as part of the stitch. Yes. Yep. Alright. We're only about six or seven stitches in this portion of the anastomosis as to not - or to be able to purse-string it in. Can you hold that Mike? Then go. Duckbill, please. Sorry. Yeah. Have to grab the lower here - grab it towards you. If I can get in and swing a little bit... Once we put our first stitch in - hopefully gathering up mucosa - Mike's going to cut this stitch. Then we're going to take another stitch just to make sure this is exactly the way we want it. We're gathering up any additional muscle that we have yet to get with our last stitch, which actually looks quite good today. Great - and let go. You can let go, Mike. Loop over the top now.
Okay, so that's our second stitch that we've put in place, and we do that just to secure any muscle that wasn't gathered up with our first stitch. Typically, we can do this with just two stitches. Occasionally - very occasionally, we put a third if we need to gather a - a little bit more tissue. Let's just take a quick look at this, Mike. I'd say that's quite nicely - that looks pretty good. That looks pretty good. We've got the - the esophagus secured to the anvil. We've got a nice edge for the staple. We've got the mucosa gathered up with our first stitch. The first stitch - we use 6 - as I mentioned, between six to eight bites as we bites as we baseball through the esophagus. Anything more than that - it becomes more difficult to tighten the purse-string and make it a loose a purse-string, so we will gather up the rest of the tissue - gather up the rest of the tissue with our second stitch if needed. So it's a 2 stitch purse-string both with 2-0 Ethibond sutures.
So now we need to bring the conduit up in the chest and put things back together. This is a sort of two to three men job at this point, and we will rotate the bud away from me a little bit more - if we could. That's good. And Asha's going to step above Mi - Mike, and Mike's going to take one step down. We remove our fan retractor because we're going to use a - a - another grasper through that. So we've got our esophagus at - above - at or above the azygos vein. Mike's going to take the camera. We're both going to take graspers, and we're going to take a third grasper - and we're going to put that through our retractor port, which will just sit there until we're ready to use it right now.
Mike and I are now going to reach down and look at our gastric conduit, which we so carefully created in the abdomen. It looks very healthy - looks just about the way we want it. Now when I do the anastomosis, I'll open up. Then we'll talk about it - and see this in just a second - but we'll open up the tip of the gastric conduit. We bring the staple handle out and our anvil out along the greater curve, and I actually want our anvil, if possible, to exit just above the epiploic. Alright, so now we need to set this up by - again, I think the other important point at this point is that the conduit does not appear to be twisted. The staple line is facing up towards us. I don't think there's an opportunity that we could have twisted this in the abdomen, which would be a devastating complication. Mike's going to hold that. I'm going to take the Bovie with the extended tip. Of course. Thanks, Asha. And we'll open up along the side of the staple line coming down here. And this will give you a glimpse into the health of your conduit as well. I may have said that prematurely, but the health of your conduit as you get a look at the mucosa once I get into it - I do this on cut with a cautery just to get in more quickly. Mike's going to reach over, and he's going to grab the edge of the stomach and - and I'd say that that - just a preliminary look at the mucosa - looks extremely healthy and pink, so I'm very happy with the way the conduit looks today. That's about as best as we can hope for for a conduit the we've changed.
So sequence now is we're going to bring a staple handle - a a stapler handle in through this inferior posterior port, the one that we've increased in size. Asha's going to step above Mike. Mike's going to take a step down this way, and Asha, you're going to hold this - this - this grasper right there while I get the staple handle into the chest. This is a 28 millimeter EEA stapler. Now Asha, so now the art is to get this in the tip of the conduit, which actually can be a little trickier than... Oh - it's so close. I think we got it, don't we? Yeah, as long as all the - all the layers of the top side are in, yeah. Yeah, we got it. Okay, so with that in, now it's - Asha, step above for a second there. What we want - you don't want this gastrotomy to be too big. You don't want it to be too small. That was probably a little on the small side. Okay, great. Hold that for a second.
Now we're just gently manipulating stomach back up and on as best we can. Great. Hold that just for a second there. Let's take a look - see what we got for length. As you bring this up, we are a little bit above our epiploic there. I don't think we're terribly above it. I'm going to borrow you here, Asha. You like that, Mike? I do. Let's just get a look. We've go the conduit in the proper orientation. It does not appear to be twisted. The staple line comes up facing us. We're going to come out all - above the epiploic. We're just about at the level of our anvil, so I'm happy with the tension and the distance - and we're going to have plenty of esoph - of stomach to - to amputate.
So next step is to bring the tip of this stapler out. I'll bring our tip out. There it is, and I use one of our graspers - the one that I put through our fan tractor or our - our anterior superior port to help guide these two together. So I'm going to slide everything back without losing the tip through. Gently retracting the stapler just a touch. Hear it pop. Click, click. Yep. So Asha's going to hold this lung over with this hand. Grab that with your left han - or right hand, Asha. Got this? Yep. Alright, let's just get that lung out of the way, and now we're just going to gently tighten this down. There should be two gearing's to this. Second gearing. And we're in the green - straight, healthy, happy. Great.
Now we're firing the stapler. Take this off. Take this off. Take your hand off, Mike. Click. Pull towards sides. So as that comes together, we - our final esophageal and our final gastric margins. Things to note are you want two complete rooms on either side, and you can see that we have our esophageal margin. You want a 360 degree ring of tissue, but you also want a 360 degree ring of mucosa as well, which we have. So that's our final esophageal margin. On the stapler as well is our final gastric margin, and now we need to finish up closing the gastrotomy. Can you hold this?
CHAPTER 28
So I think this is a critical part of the operation. We want to limit the amount of tissue between the anas - circular anastomis and where we close our gastrotomy. I do not want a very thin skin bridge up here because I - or a skin - or a thin bridge of gastric conduct as I think that that is a potential ischemic point, so we tend to leave a little bit of a redundant tip up here. While he's going to bring his hand up like that, I'm going to bring this up like this. Open. It's open. Take yours off the chest wall and up towards me just a touch - yeah. So that appears to be a couple centimeters away. Agree? Yep. Close. Great. Take one more, Asha.
So again, I'll leave a little bit of a redundant tip as to minimize that bridge of tissue between the circular anastomosis and our closure of this gastrotomy. One more low, please - not tend to cause any type of issues with dysphagia or otherwise. We're going to - squeeze. Now, this - we just call this sort of a wedge gastric resection of our conduit. Great - looks good. It's nice and healthy. So we're going to advance our NG tube now. Let go. Asha. What are you at now for distance? Yeah, keep going. Yeah, keep going. There - there you just went by. Keep going. So we got about 50. Put it on suction. We're going to put it on 50 and on suction. So that's - take him low on saline, please - that's our finished product.
We di - we dissected all the nodes we could find the chest. We've got a nice high anastomosis in the chest. We've got a very healthy appearing gastric conduit that has not been beat up. Staple lines all looks intact. We irrigate the chest gently. Okay. It looks great. I'm very happy with the way that turned out. Okay. So we don't tend to use an epidural for these patients at all. I'm going to take the Marcaine. Great.
And we use intrathoracic rib blocks. So I use a needle that I bring through the chest wall, which allows me to directly inject Marcaine and provide our post-op analgesia. Start getting our neural vascular bundles, so I can see the... We also will liberally use Toradol once we get to the ICU and a PCA. The epidural I think simplifies the postoperative management of these patients by limiting the blood pressure swings, the amount of neosynephrine they end up on in ICU setting room or moderated setting postoperatively, the volume that they end up getting because the epidurals on, etc. So if we can avoid it, I think it - again, everything just simplifies the care of the patient postoperatively. Great.
That's 30 CCs up sent Marcaine. I leave two drains. I leave one soft suction drain with - to drain the fluid, and we leave one true chest tube, which we tend to remove on our postoperative day one. Couple things about the - the drains that - at least that I personally like - I don't - I like this drain to stay in until the swallow study gets done. The drain fluid and potentially look for any evidence - God forbid - of a chyle leak. I do not like to cross the anastomosis. I think putting suction on the anastomosis potentially puts that at risk, so I tend to tuck this along the gutter here, which I think would capture anything - God forbid - if we had some anastomotic issue - but does not come across the anastomosis itself. You can see it sit sort of just up to but not across. So we've got our true chest tube in place. We got a Blake drain - cha - in place. We've got our conduit. It looks healthy and in the proper position. We got our NG tube advanced. We've given our local anesthetic for pain control. Now we're going to inflate the lung.
Give me a 15 or 20 in hole. And that's it, so with excellent help and good anesthetic, that's about a 3 to 3 and a half hour operation. I'd say it went about as well as we could hope. Okay, so now we're just going to close our incisions.
I think it helps really understanding the anatomy, after having done a few non-minimally invasive procedures, to understand sort of - right - what you want to accomplish so that then you can - I think it's - translate that to a laparoscopic and thoracoscopic - I think it's nice to do a combination of - of esophagectomies - open, different types. Again, the anatomy becomes much more familiar. I think it's also important to do a - a combination of, if possible, foregut and VATS procedures, which I think make you facile with the equipment in the chest and the abdomen - make your dissection a little more facile. So having a - a practice of - you know, of other benign and malignant problems in the chest and abdomen - I think - that you do minimally invasive - make this an easier operation to accomplish. Yeah.
CHAPTER 29
So we've completed our minimally invasive esophagectomy. I thought it was a very uneventful operation. Technically, I thought it went extremely well. We had no difficulty in the abdomen mobilizing things. I think we're able demonstrate all the key pom - the key components to the abdominal portion of dissection, including the sequence of steps that we tend to use to work our way through the abdomen. In the chest, we got nicely above the azygos vein. Our treatment was primarily at the GE junction and maybe a little bit above, so we had a nice wide margin up above the azygos vein, and as I commented intraoperatively, I think the higher we go, the better functional result these patients often will get from a reflex perspective. I thought the anastomosis went well. We used two purse-string sutures, which is our typical approach. The conduit sat quite nicely under no tension, and it looked very healthy at the completion of the operation. We completed a nice lymph node dissection, and really, I thought it was about as straightforward an operation that - that we could hope for in this patient. Fortunately, we saw no evidence of - of disease elsewhere as we inspected her abdomen and her chest.
I will comment a little bit on her treatment in that she appeared to have a little bit more in the sense of fibrosis and radiation changes at her GE junction, and things were a little bit more adherent to the hiatus when we were able to take a little edge of muscle with the dissection plane to get that all out. I think the amount of fibrotic radiation changes you see after neoadjuvant treatment is highly variable. She does seem to have a little bit more than most but did not appear to be an impediment to us getting the operation done today.