Functional Endoscopic Sinus Surgery (Cadaveric): Maxillary, Ethmoid, Sphenoid
, Duke University School of Medicine
Transcription
CHAPTER 1
So we'll be starting the functional endoscopic dissection of the cadaver, and we’ll be focusing on the left sinal nasal cavity. You can see that I have the cadaver head positioned in the way I would during surgery with the head slightly turned towards me, and I like the height of the table to be such that my arm is resting on my torso - and I'm not having to operate them from this type of position here. So, arm on the torso to minimize fatigue.
So now I'm going to - I'm using a zero degree scope to visualize the sinal nasal cavity, and I'll just point out some structures initially. We obviously have the inferior turbinate here to the right of the screen, the septum, which is rather straight on this cadaver - and then we see the middle turbinate here.
CHAPTER 2
So for the first step of the operation what I always do is to use the Freer elevator to medialize the middle turbinate, and I want to do this gently so that I don’t fracture the skull base and cause a CSF leak. So I’m going to gently medialize that, and already, you start to see the structures in the middle meatus. See the uncinate process here. See the ethmoid bulla here, and then behind the ethmoid bulla is going to be the basal lamella all the way posteriorly.
CHAPTER 3
The first step of the operation is to remove the uncinate process or the uncinectomy. Here, I like to use the right angle probe to get behind the uncinate and fracture this anteriorly. I really try to fracture as much of it as I can. Sometimes the bone can be quite thick. I try to fracture this forward - like that. So I’m superior here, and then also, I want to fracture this inferiorly as well. Once the uncinate is mobilized, I like to divide it with a backbiter, inferiorly here. In here you can see that I'm creating a cut right in the uncinate, and I can take more of the uncinate with a backbiter too if - if I want. Here, I’m using the microdebrider to remove the remnants of the uncinate process, being very, very careful not to get too close to the lamina. So I just let the tissue fall into the debrider. This is the more inferior portion of the uncinate, which is heading posteriorly - removing that as well. So I think we have a pretty good uncinectomy at this point, and the next thing that I like to do is to look for the natural ostium of the maxillary sinus.
CHAPTER 4
Now the natural ostium will be approximately - sort of at the junction between the inferior middle turbinate - so here in this area. And it'll be behind the uncinate process, so I'm going to sneak in behind the uncinate and see if I can fall into the maxillary sinus, which I am right now - right here. And once I fall in, what I will do is to gently dilate the maxillary sinus. And I already start to see inside the maxillary sinus. So again, I will use the microdebrider to widen that maxillary sinus a little bit more. Sometimes when you have the - have some thick bone there, we need to remove it with cutting instruments. So here I’m going to introduce the straight true cutting forceps - going to open this maxillary sinus up. And what I will do is to further open up that maxillary sinus, inferiorly. So I’m going to push some of this tissue down here. Okay, and then I will debride the rest. Once the maxillary antrostomy is completed, I like to use the probe to make sure that it isn’t - that it is the natural ostium. And I like to feel the roof of the sinus, and I feel where it transitions to the lamina - and feels as if the lamella will be right there - right here, at this level. Often, if you push on the eye, you can see some transmission there. Not so much on this cadaver. Alright, we assume that the lamina will be approximately at this level.
CHAPTER 5
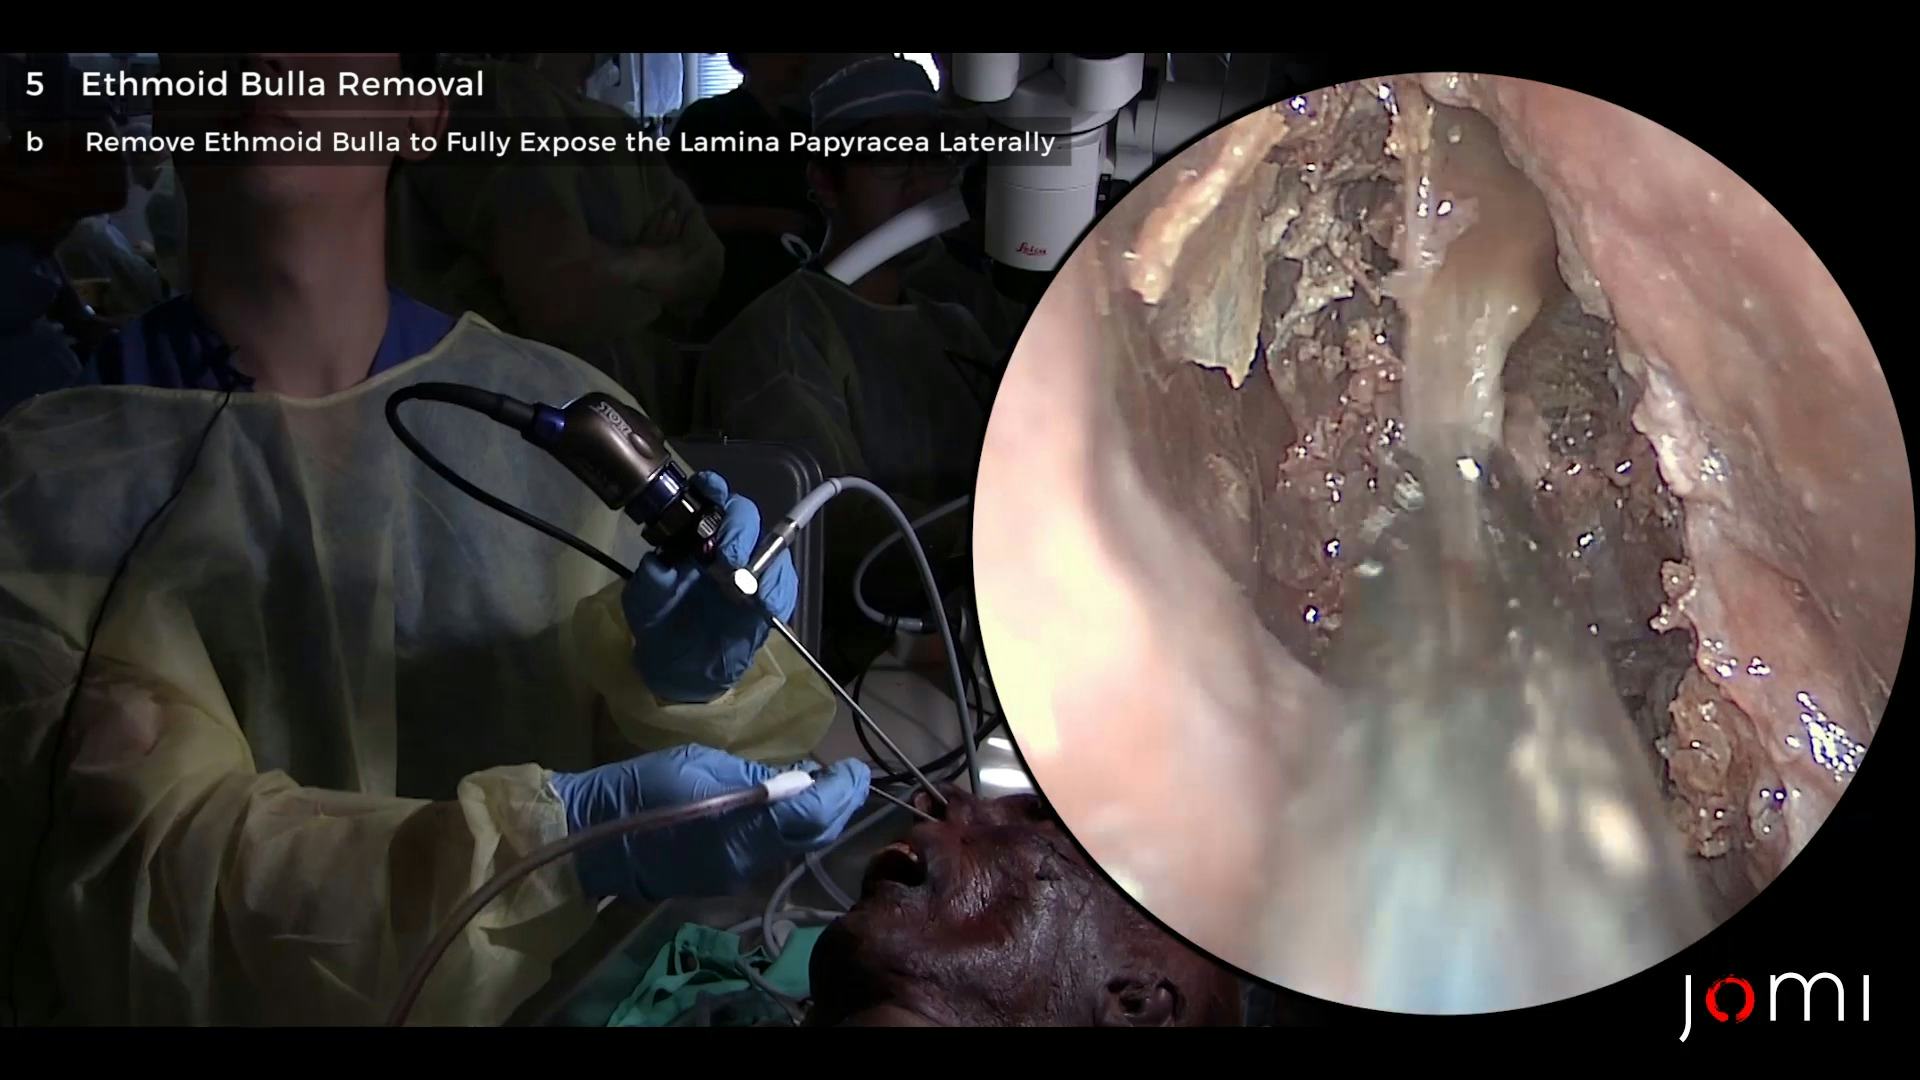
The next step is to remove the ethmoid bulla, so what I like to do is to use the J curette to feel for the retrobullar recess. Sometimes, there is a prominent retrobullar recess - sometimes not, but I'll try to get into that retrobullar recess. Sometimes, I enter into the actual bulla, and I like to fracture that anteriorly. Here, I can use some cutting forceps to take down the rest of this bulla. I'm continuing to remove the bulla.
CHAPTER 6
Once the ethmoid bulla is removed, the anatomy that we see is we have the lamina papyracea right here along this area here, and the next landmark that we see is the basal lamella, which is going to be here at this level. Notice that we’re likely in the posterior ethmoid cavity here at this point. By taking down the bulla, we actually enter the basal lamella at least in this area, but I like to enter the basal lamella typically inferomedially in this area here.
CHAPTER 7
I’m going to use the curette to enter the basal lamella down here and gently fracture the basal lamella, and as soon as I enter that basal lamella, I like to look for the superior turbinate to confirm that I'm in the posterior ethmoid cavity. So we see superior turbinate right there at the edge of my curette. Here, I'm using the microdebrider to remove some of the basal lamella.
CHAPTER 8
Here, I’m going to use the cutting forceps to take down some more of the partitions in the posterior ethmoid cavity. And I'm going to remove the remainder of the posterior ethmoid partitions, which we see right here. So we're all the way back to the posterior ethmoid cavity here - and looks like we have a few more partitions. This bone is quite thick.
CHAPTER 9
For the sphenoidotomy, I like to resect the inferior portion of the superior turbinate, which is what I'll do at this point. Resecting the inferior part of the superior turbinate there - and just a little bit more. And sphenoid sinus ostium should be at this level right here, and I like to use the Freeer to find that. See it right there? I’m just going to dilate that sphenoid sinus opening. So here's a sphenoid sinus opening, which I'm now widening. There is the sphenoid sinus - see a little bit of some ossification there along the wall, but there is a sphenoid sinus.
CHAPTER 10
Once we identify the sphenoid sinus, I like to proceed with the ethmoidectomy in a posterior to anterior direction to ensure that the skull base is fully skeletonized. So I'm in the sphenoid sinus. We feel - we see skull base here, and we can follow that skull base along here, here. Looks like there's a partition right there, so we'll remove that partition. Let me - before we skeletonize the skull base... And once we get to the area of the frontal recess, it's a good idea to switch to an angle scope since the visualization is somewhat limited. Okay. So we've completed the ethmoidectomy at this point except for the frontal sinus dissection. So we have the sphenoid sinus back here, and we can see the skull base as you come anteriorly, right along here, here, here - and then the frontal recess - as I had mentioned, the frontal recess I like to dissect with the angled scope using curved instruments. So that completes the ethmoidectomy, maxillary antrostomy, and the sphenoidotomy.