Creation of a Radial-Cephalic Arteriovenous Fistula
109623 views
,
Massachusetts General Hospital
Procedure Outline
- Initiate Anesthesia
- This procedure is regularly performed under general anesthesia or monitored anesthesia care (MAC) with or without intravenous sedation. The choice of approach is based on the patient's baseline risks and ability to tolerate anesthesia. If performed under MAC, either local anesthesia or a peripheral nerve block is obtained in the holding area.
- Position Patient
- The patient is positioned supine with the operative arm abducted and resting comfortably on a specialized wide arm board designed for hand surgery. If this is not available, it is possible to have two standard-sized arm boards placed next to each other.
- Mark Incision and Inject Local Anesthetic
- Use preoperative US and manual palpation to determine the location of the cephalic vein and radial artery.
- If the artery and vein are near to each other, a single curvilinear incision is acceptable. If the vessels are separate from each other, it is better to perform two parallel longitudinal incisions and create a subcutaneous tunnel through which to position the cephalic vein at the time of anastomosis. In our case the artery and vein were in close proximity.
- Incise and Dissect to Vein
- Make a 5-cm curvilinear incision over the artery and vein with the proximal end of the incision closest to the vein or directly superficial to it.
- Carefully dissect the subcutaneous tissues and fat with a combination of sharp dissection and electrocautery.
- Mobilize Vein and Retract with Vessel Loop
- Identify the cephalic vein in the radial groove and dissect it proximally and distally to expose a 4-cm segment that is of an appropriate diameter.
- Ligate vein branches with braided suture.
- Locate and Mobilize Artery
- Identify and palpate the radial artery (it courses parallel to the cephalic vein) and sharply dissect a 4-cm portion that is of adequate caliber.
- Place vessel loops proximally and distally along the artery. These should be double looped and used for retraction and occlusion of the artery. This is less disruptive to the artery than vascular clamps, and does not crowd the small surgical field.
- Tie and Ligate Vein
- Ligate the cephalic vein at the distal most end of its course. Be sure to mobilize an adequate length of the vein proximally, such that it will anastomose with the artery in a tension-free manner.
- Spatulate the vein at an oblique angle to perform a larger anastomosis.
- Dilate Vein
- Flush the proximal end of the vein with heparinized saline solution; this will enable evaluation of vessel caliber as well as any side branches or iatrogenic vein injuries that may need repair.
- Place a Bulldog clamp proximal on the vein.
- Incise Artery
- After proximal and distal control of the artery (with vessel loops), an arteriotomy is created, the length of which should be limited to 4–6 mm to limit the risk of creating a vascular steal phenomenon. This is especially important with a small diameter artery. The size of the arteriotomy should roughly correspond to the spatulated diameter of the vein.
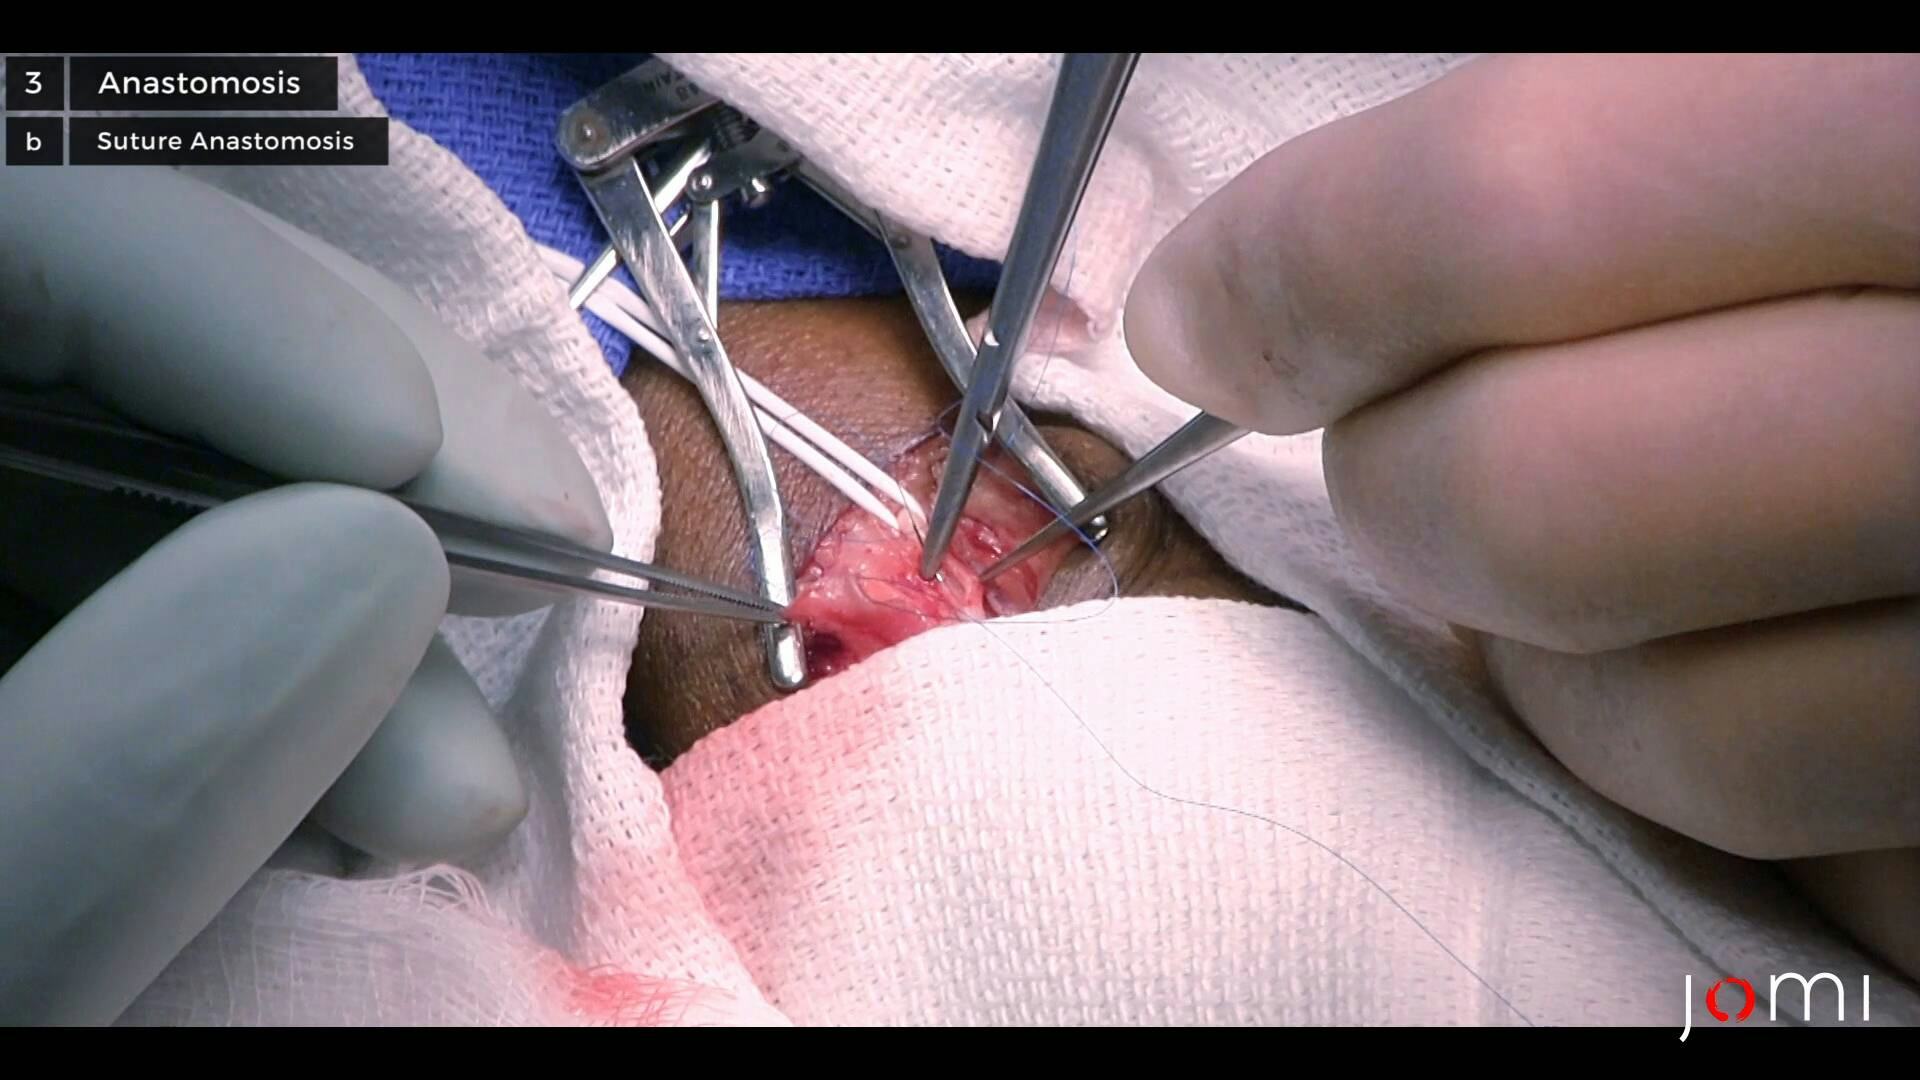
- Suture Anastomosis
- Create an end-to-side anastomosis between the cephalic vein and radial artery using 6-0 or 7-0 polypropylene suture in a continuous running fashion, as this will prevent enlargement of that anastomosis, which may also lead to steal phenomena.
- Inspect and Adjust
- Release the clamp on the vein and then the vessel loops on the proximal and distal portions of the artery.
- Test Flow with Palpation and Doppler Probe
- Palpate the newly-created fistula to ensure that there is a palpable thrill indicating appropriate flow. As an adjunct to palpation, the surgeon can use a Doppler probe to listen for appropriate arterial signal at the site of the anastomosis.
- Close the subcutaneous tissue over the fistula using a running 3-0 braided stitch. Close the skin in a single layer using a 4-0 monofilament stitch. Single-layer skin closure is also adequate in cases with minimal subcutaneous tissue.
- Immediate Postoperative Care
- Place a standard postoperative occlusive dressing. Some pressure dressing may be necessary in the event that the patient is at elevated risk of raw surface or other postoperative venous bleeding. This should not be placed proximal to the incision to avoid pressure on the proximal vein and occlusion of it.
- Postoperative pain should be minimal; patients often do not require opiate pain medication.
- Upon discharge the patient should receive instructions for hand exercises to start 1–2 days postoperatively. These exercises should increase blood flow through the venous system, which in turn will aid in maturation of the AVF.
- Postoperative Restrictions and Plan for Follow-up
- Postoperatively activity is minimized for the immediate postoperative period (specifically, avoid lifting heavy objects for 14 days).
- Patients are instructed to palpate their newly created fistula every day and should contact their surgeon immediately if a thrill is absent.
- The patient will follow up in the surgical clinic approximately two weeks postoperatively to assess healing and fistula patency, and again 6–8 weeks postoperatively to evaluate for fistula maturation.